What is a 360 ° panorama?
For some time now, I have noticed on Facebook the presence of 360 ° panoramic photos and in particular those of a Minecraft group to which I am a subscriber. By moving the phone, the camera changes orientation and gives the illusion of movement in all directions. It is a fun and immersive way to discover a real or virtual place.
How is it possible? This is in fact an equirectangular projection, the entire 3D scene is displayed in a single image with the top and bottom edges appearing flattened. Some cameras can automatically take this kind of image.
In this article, we will see how to achieve this effect using Blender software.
I choose the floating islands world as a model to render this image :
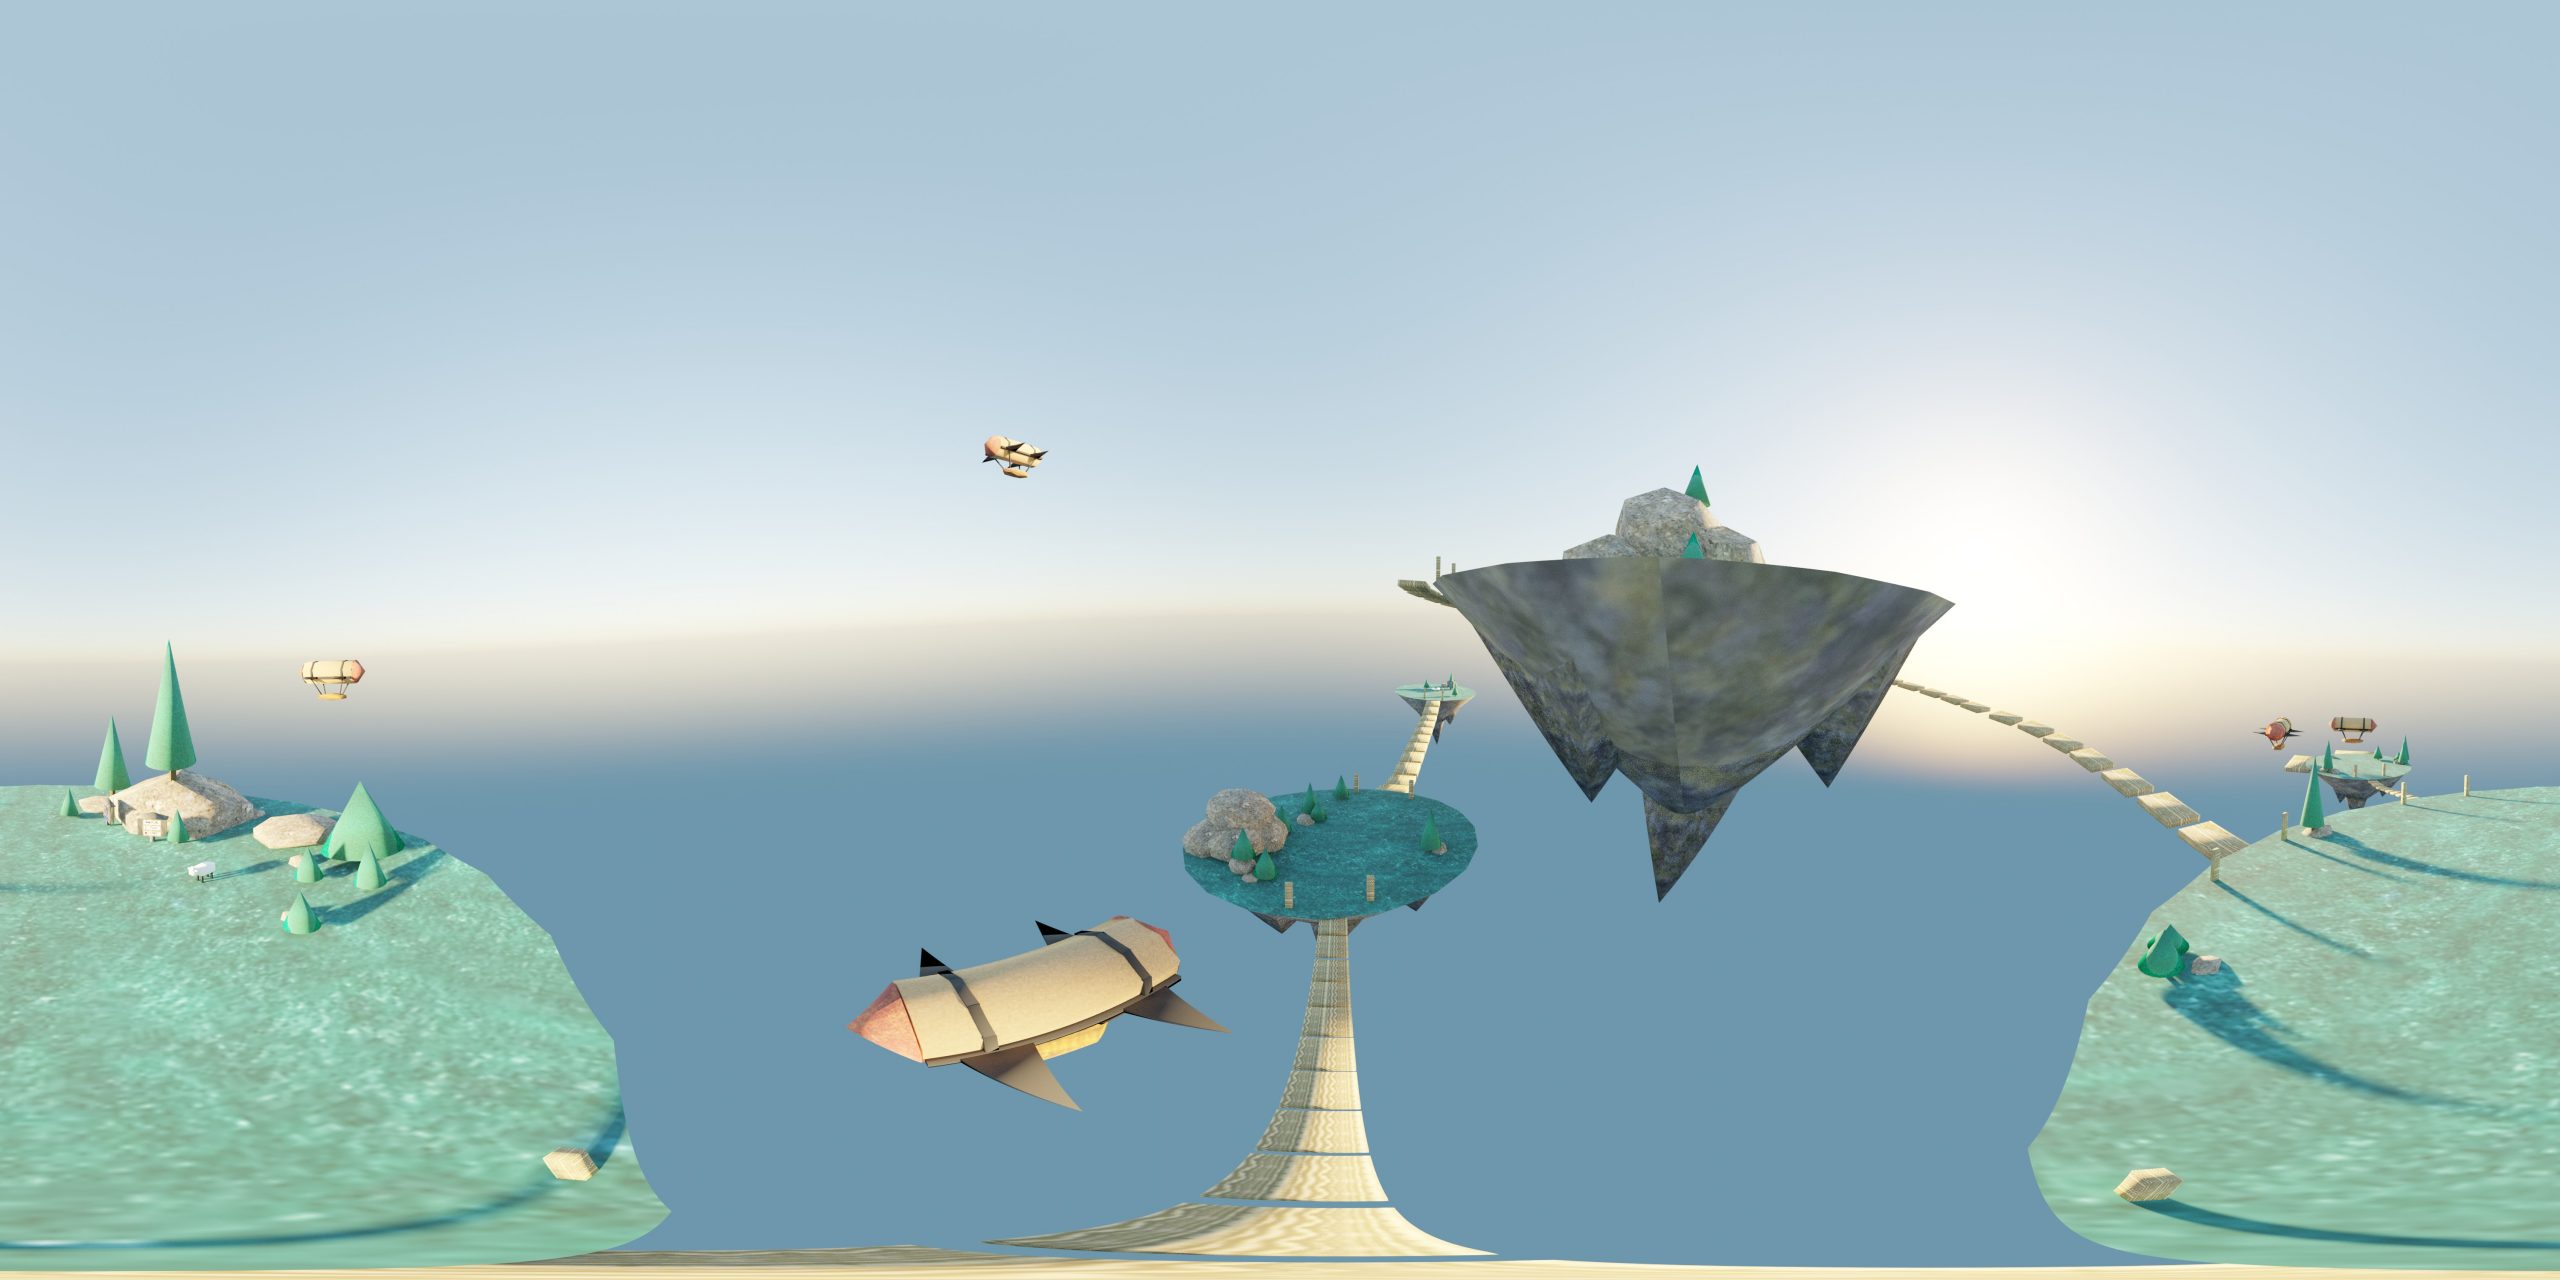
And what it looks like once the image is posted on facebook:
Now let’s find out how to do this.
Blender configuration
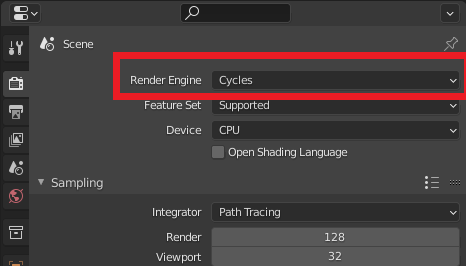
In the Render properties panel, select the Cycles renderer.
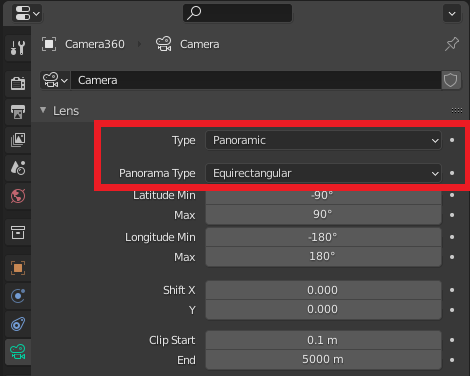
Then modify the following properties of the camera:
Type: Panoramic
Panorama type: Equirectangular
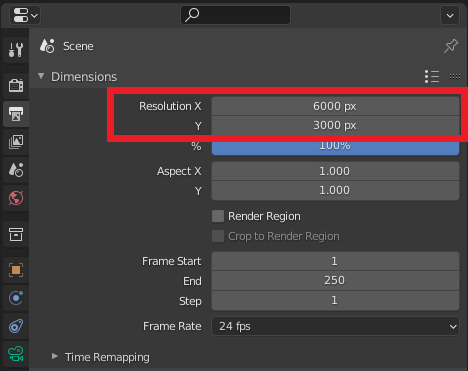
In the Output Properties panel, choose a resolution of type 2: 1, which is twice the size in X (width) compared to Y (height). With 6000×3000 pixels the rendering will be of good quality.
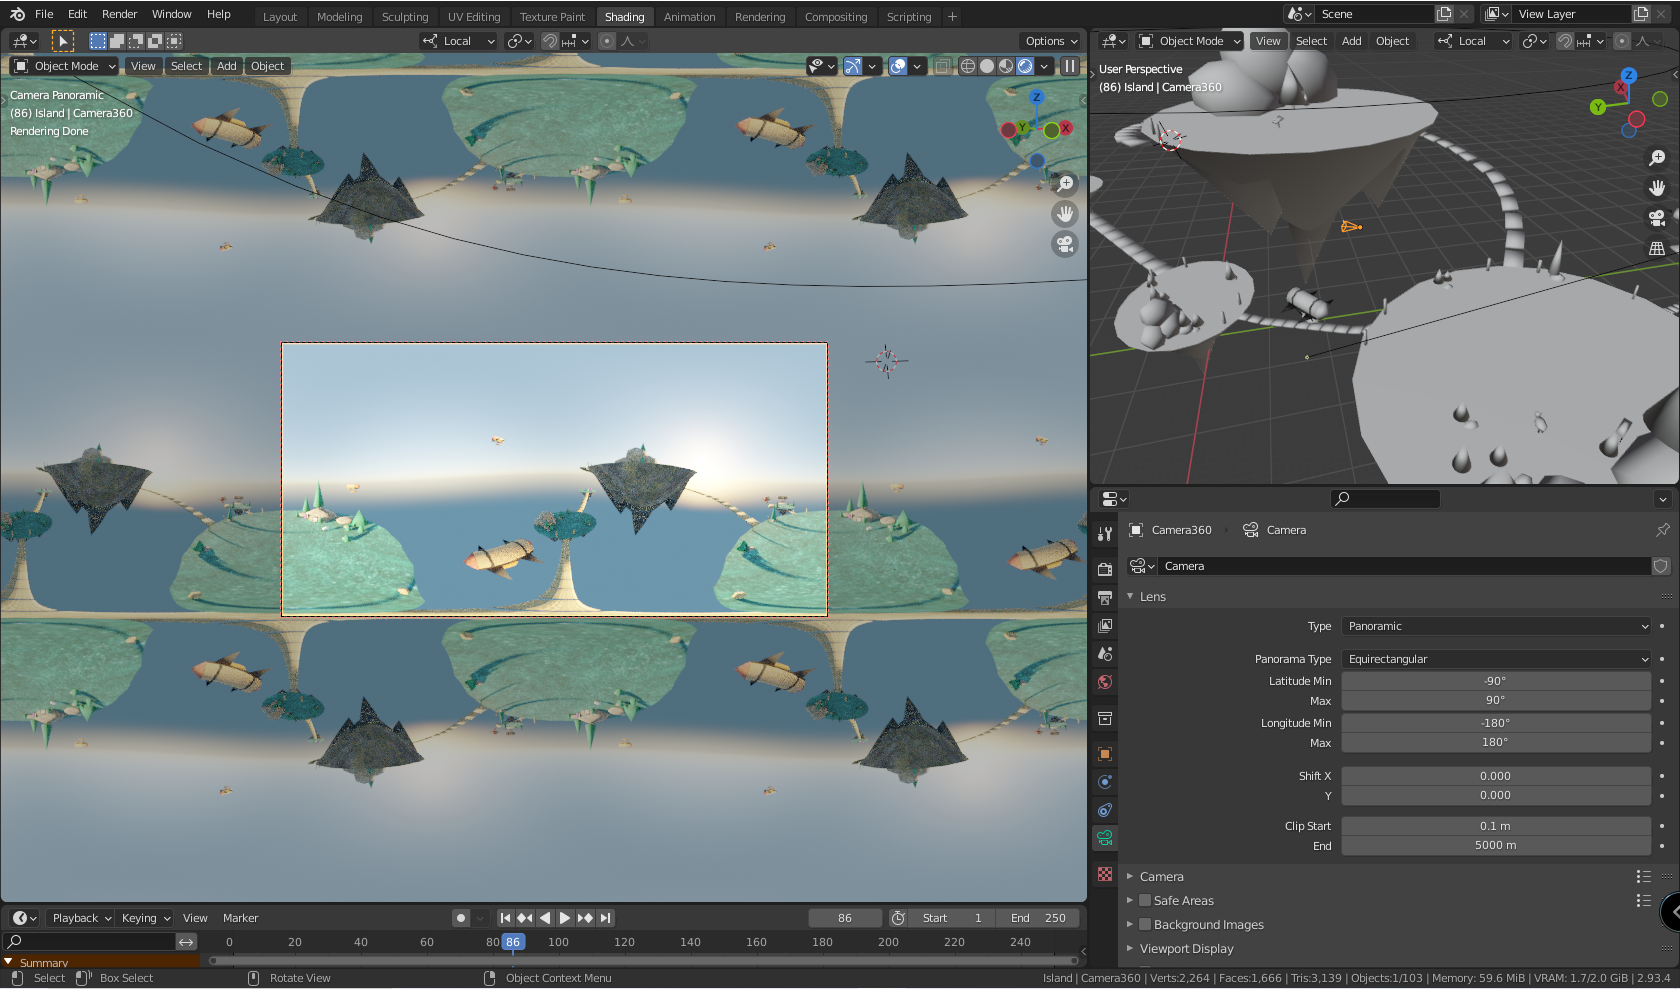
Choose a suitable location in your 3D scene so that there is something to discover all around. Here I have deliberately placed the camera in the center of the islands a little higher up.
Press F12 to start the generation of the image.
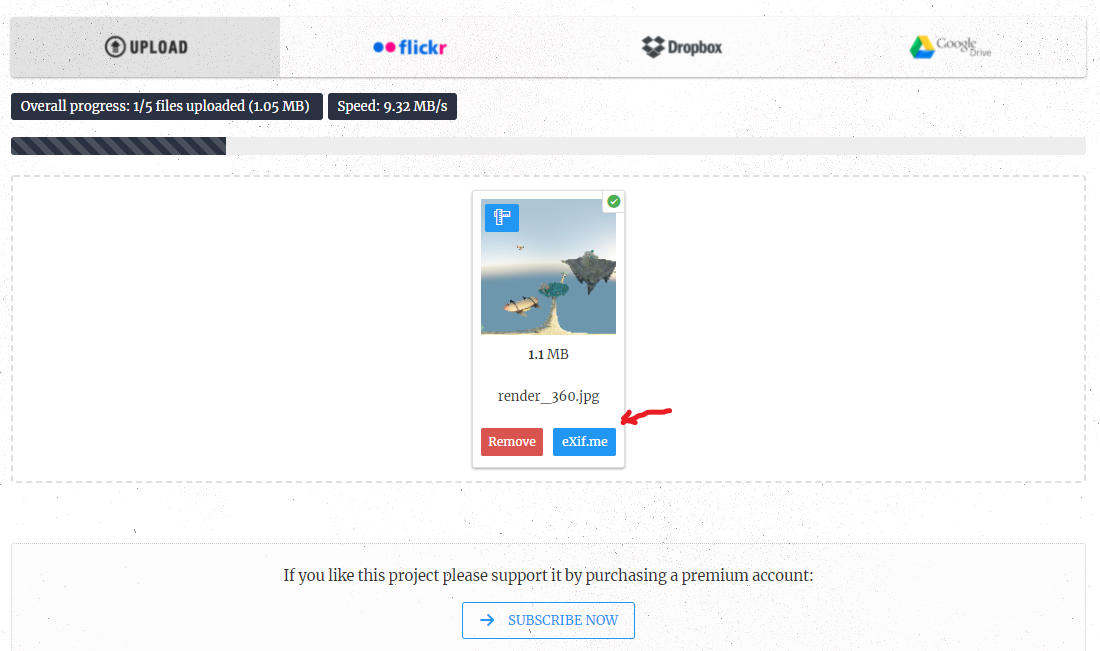
When rendering is complete, save the image in JPEG format.
Exif settings for the image
For Facebook to recognize this image as a 360 panorama, certain Exif attributes of the image obtained previously must be changed.
For this, there is a very practical site called TheExifer which allows you to modify the exif properties of your image.
Go to the following address: https://www.thexifer.net/
First step drag and drop your image in the indicated area
Click on the “Exif.me” button
Select the option “Make this picture compatible with Facebook 360”

The site will automatically add the following exif options:
- Make : Ricoh
- Model : Theta S
- Projection Type : equirectangular
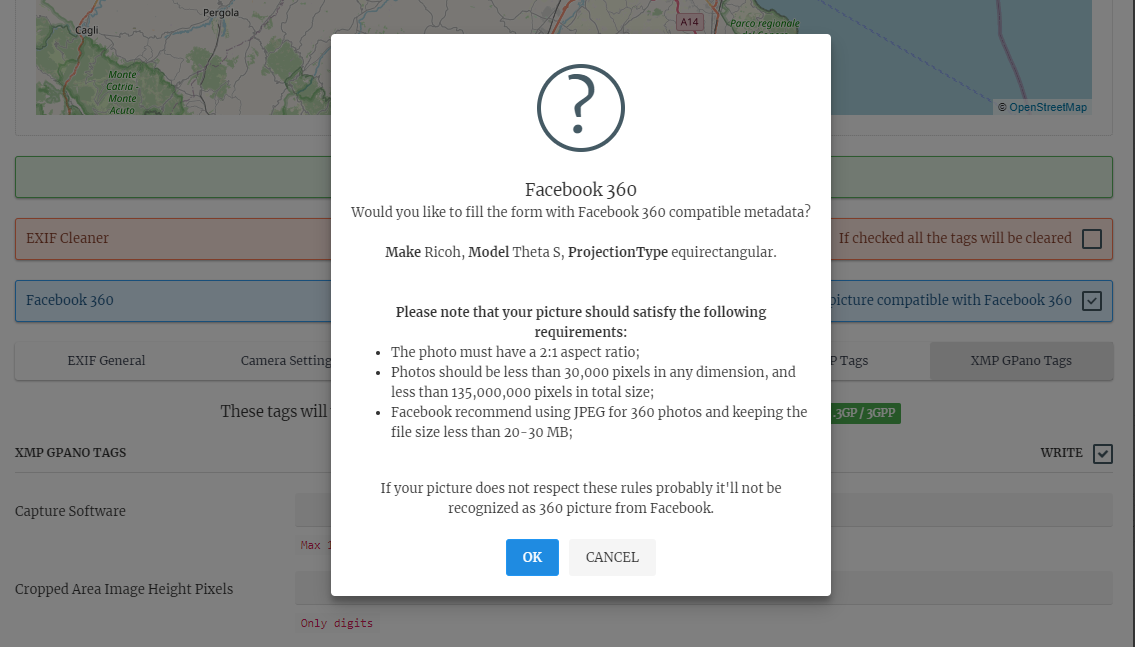
Click on the “GO.EXIFING” button to apply the changes.

Click the “DOWNLOAD.ME” button to download your edited image. This is now ready to be published on Facebook.

Post on Facebook
Go to Facebook and add a post. Click the Photo / Video button.

Choose your panoramic image. Facebook will recognize that it is a 360 panoramic.
A logo in the shape of a white globe normally appears at the bottom right.
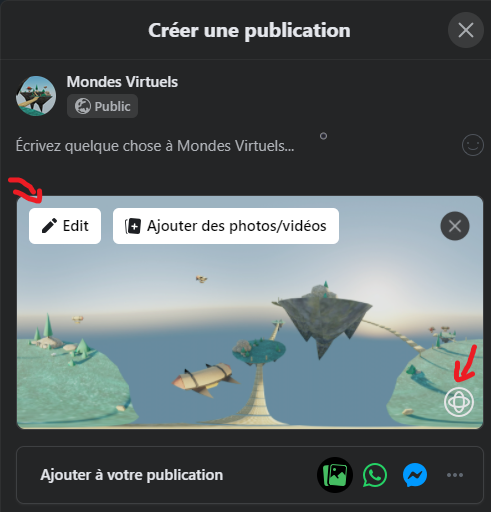
Click on the “Edit” button to choose the starting position of your pan.
Validate.
Congratulations 👍🎉🏆
You have just created your first panorama on Facebook 😊
Want to learn a new way of creating 360° panorama with AI tools? Don’t miss my new tutorial on creating stunning 360° panoramas on your local computer using Stable Diffusion, ComfyUI, and Panoraven!