Introduction
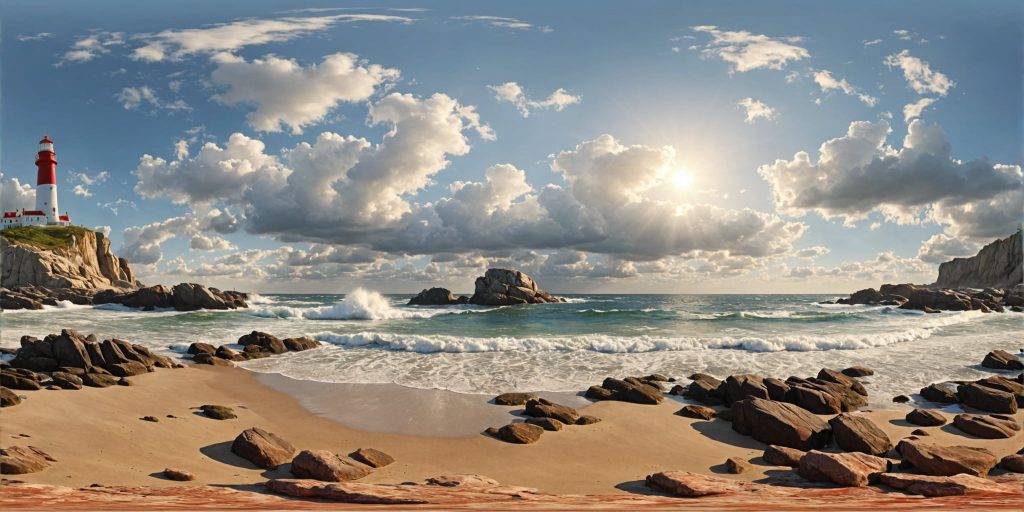
A few months ago, I was so impressed by the SkyBox Lab of BlockadeLabs that I wanted to make panoramas on my local computer using an AI Image Generator. In this tutorial, I will show you how to create and view stunning 360° panoramas like the one above thanks to Stable Diffusion, ComfyUI, and Panoraven. Here are the following steps :
- ComfyUI installation
- make a panorama picture
- use a 360 ° lora
- join edges
- increase resolution ( upscaling )
- conclusion
- bonus
But first, what is exactly a 360° panorama?
A 360° panorama like the one above is an image or photograph that captures a complete view around a central point, covering 360 degrees horizontally. This allows the viewer to look in all directions, providing an immersive experience as if they were at the location. 360° panoramas are often used in virtual reality, virtual tours of tourist spots, real estate presentations, and other applications where a comprehensive and detailed view of the environment is desired. In our case, we will not use photography but images created with an AI technology called Stable Diffusion.
Stable Diffusion is a machine-learning model that generates high-quality images from text descriptions. It leverages the diffusion process to iteratively refine images, ensuring stability and realism in the generated visuals. To use this model we need a tool called ComfyUI, a modular Stable Diffusion GUI with a graph/nodes interface. ComfyUI is a good choice compared to Automatic 1111 because it’s fast and works on computers with limited resources in graphical card VRAM ( which is my case ). ComfyUI is a little more difficult to use at first with all the concepts of graphical chained nodes, but it becomes very convenient and powerful over time. You get all the workflows through this tutorial by downloading pictures and dropping them into your ComfyUI screen.
Before going any further, here are the minimal requirements:
- A computer or laptop with a graphical card with 4GB minimum of VRAM ( it’s possible only on CPU but it will be really slow )
- 10 GB of free space disk ( each SDXL model can take about 6 GB )
- Patience ( up to 5 min per image on a RTX 3050 4GB, 20s on a RTX 3090 with 24GB )
If you are ready, let’s go!
ComfyUI installation
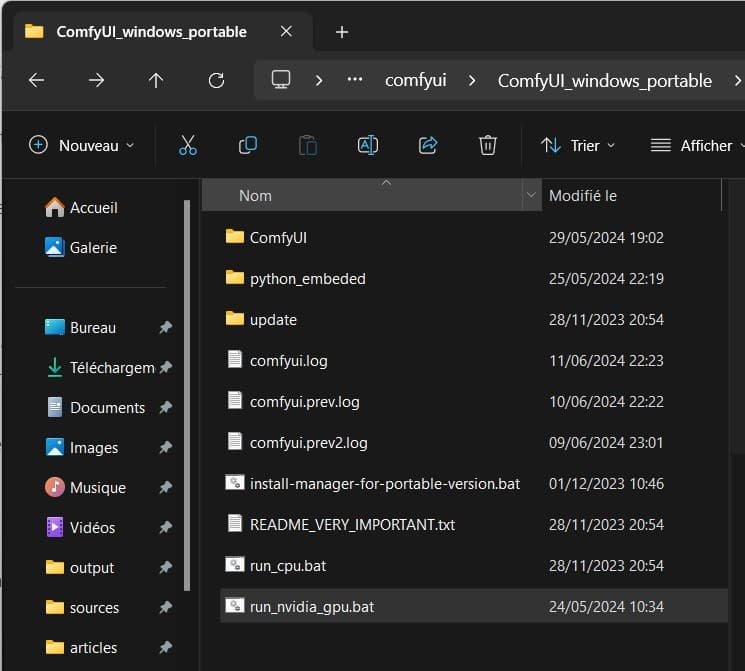
ComfyUI is written in Python and can be installed manually on Windows or Linux. However, for the sake of this tutorial, we will download the 7z archive for Nvidia cards on Windows (1.6 GB) using the direct link provided in the installation section.
After uncompressing the 7z archive ( new_ComfyUI_windows_portable_nvidia_cu121_or_cpu.7z ) on your local hard drive, double click on the run_nvidia_gpu.bat in the directory:
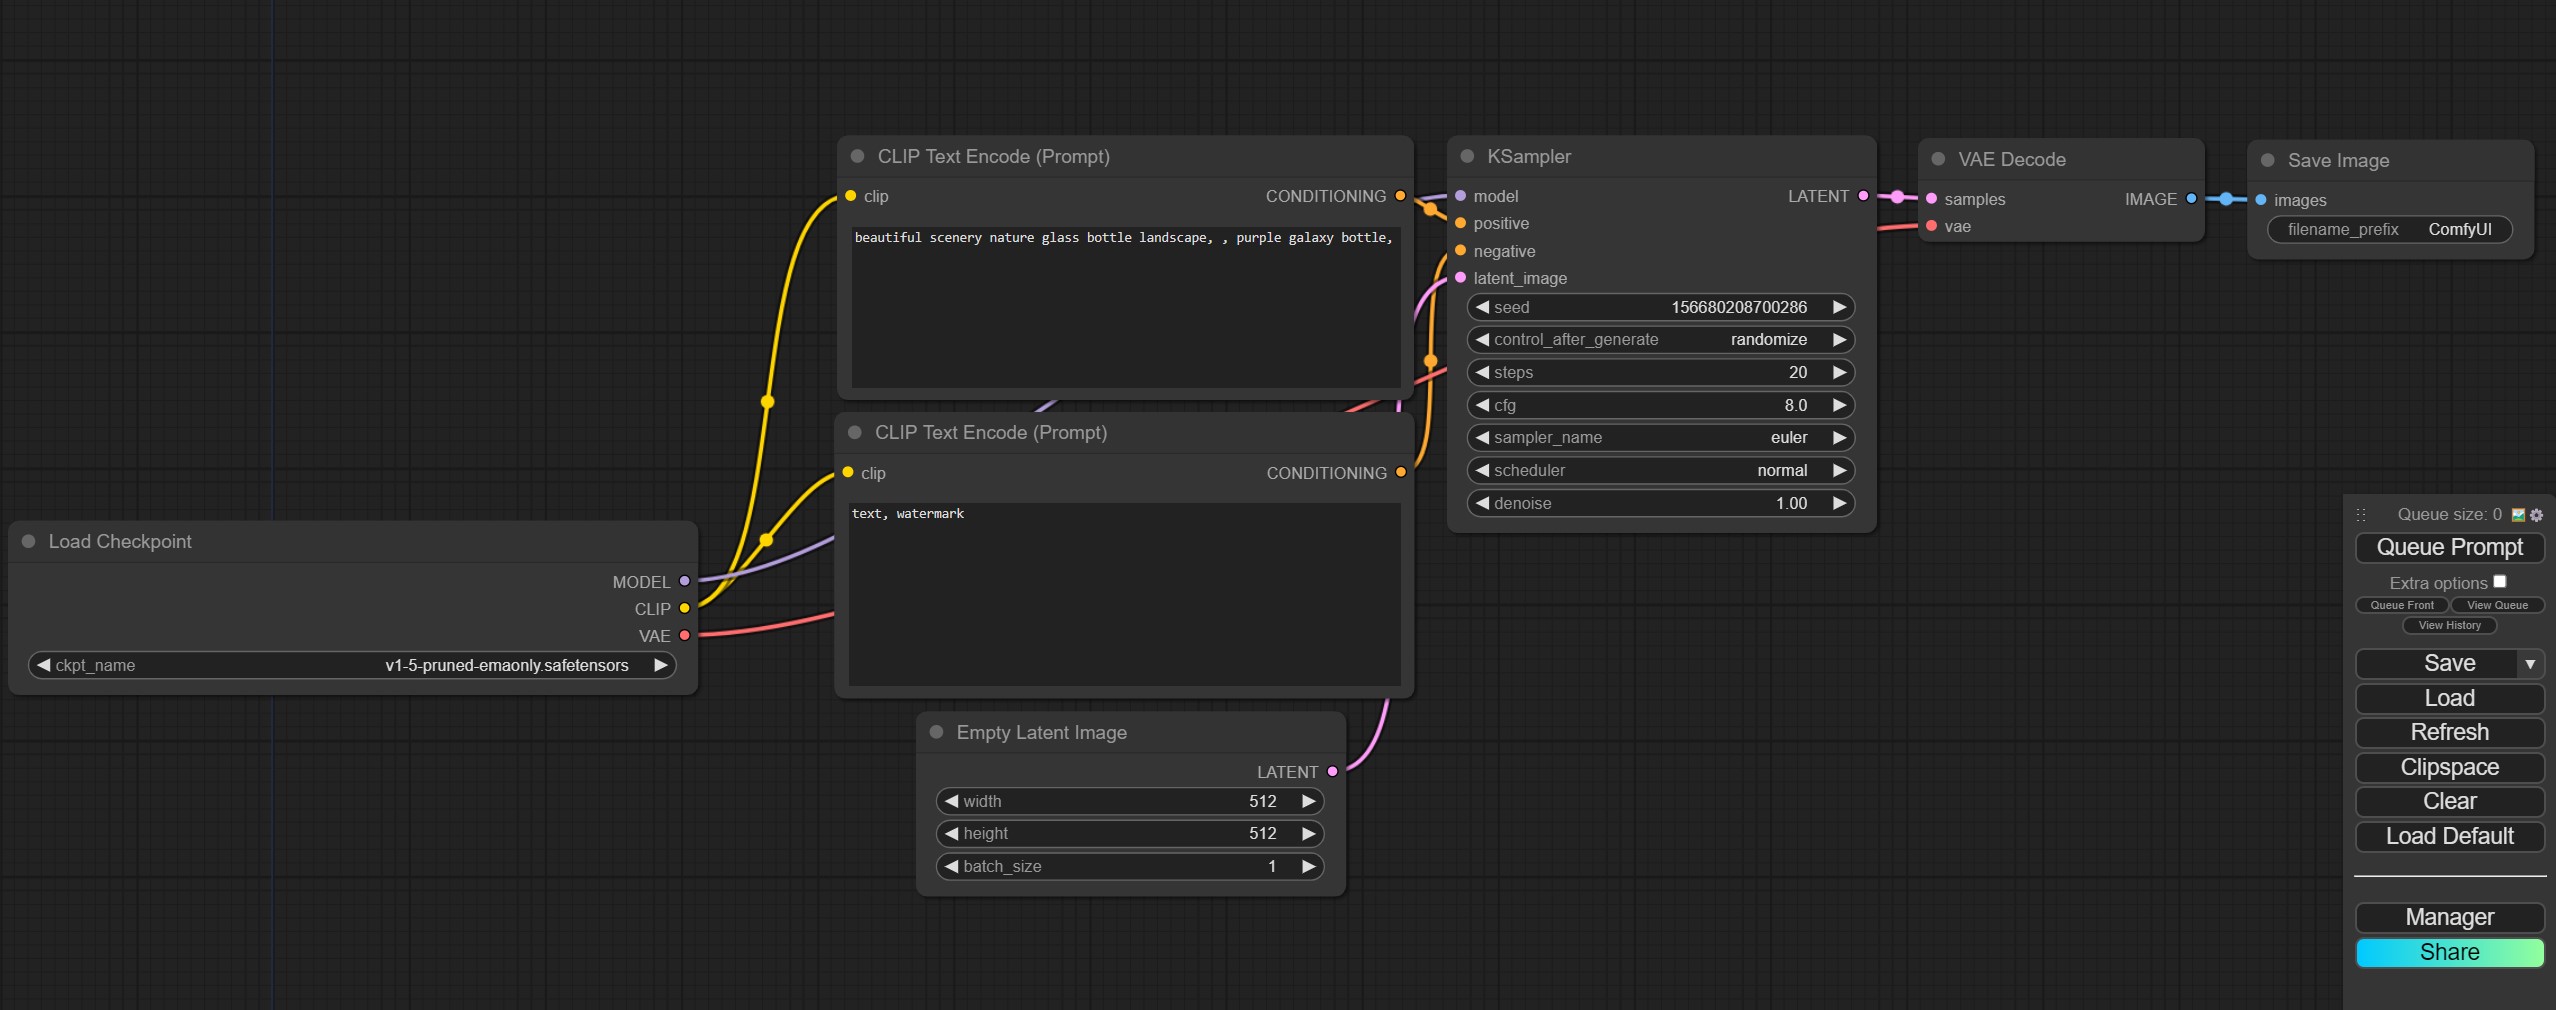
It will launch a local server on your computer and open a tab in your browser at the local address “http://127.0.0.1:8188” with a simple workflow. If you try to generate by clicking on the “Queue Prompt” button on the right side you will get an error because you don’t have yet a model loaded ( the first node on the left side is called Load CheckPoint )
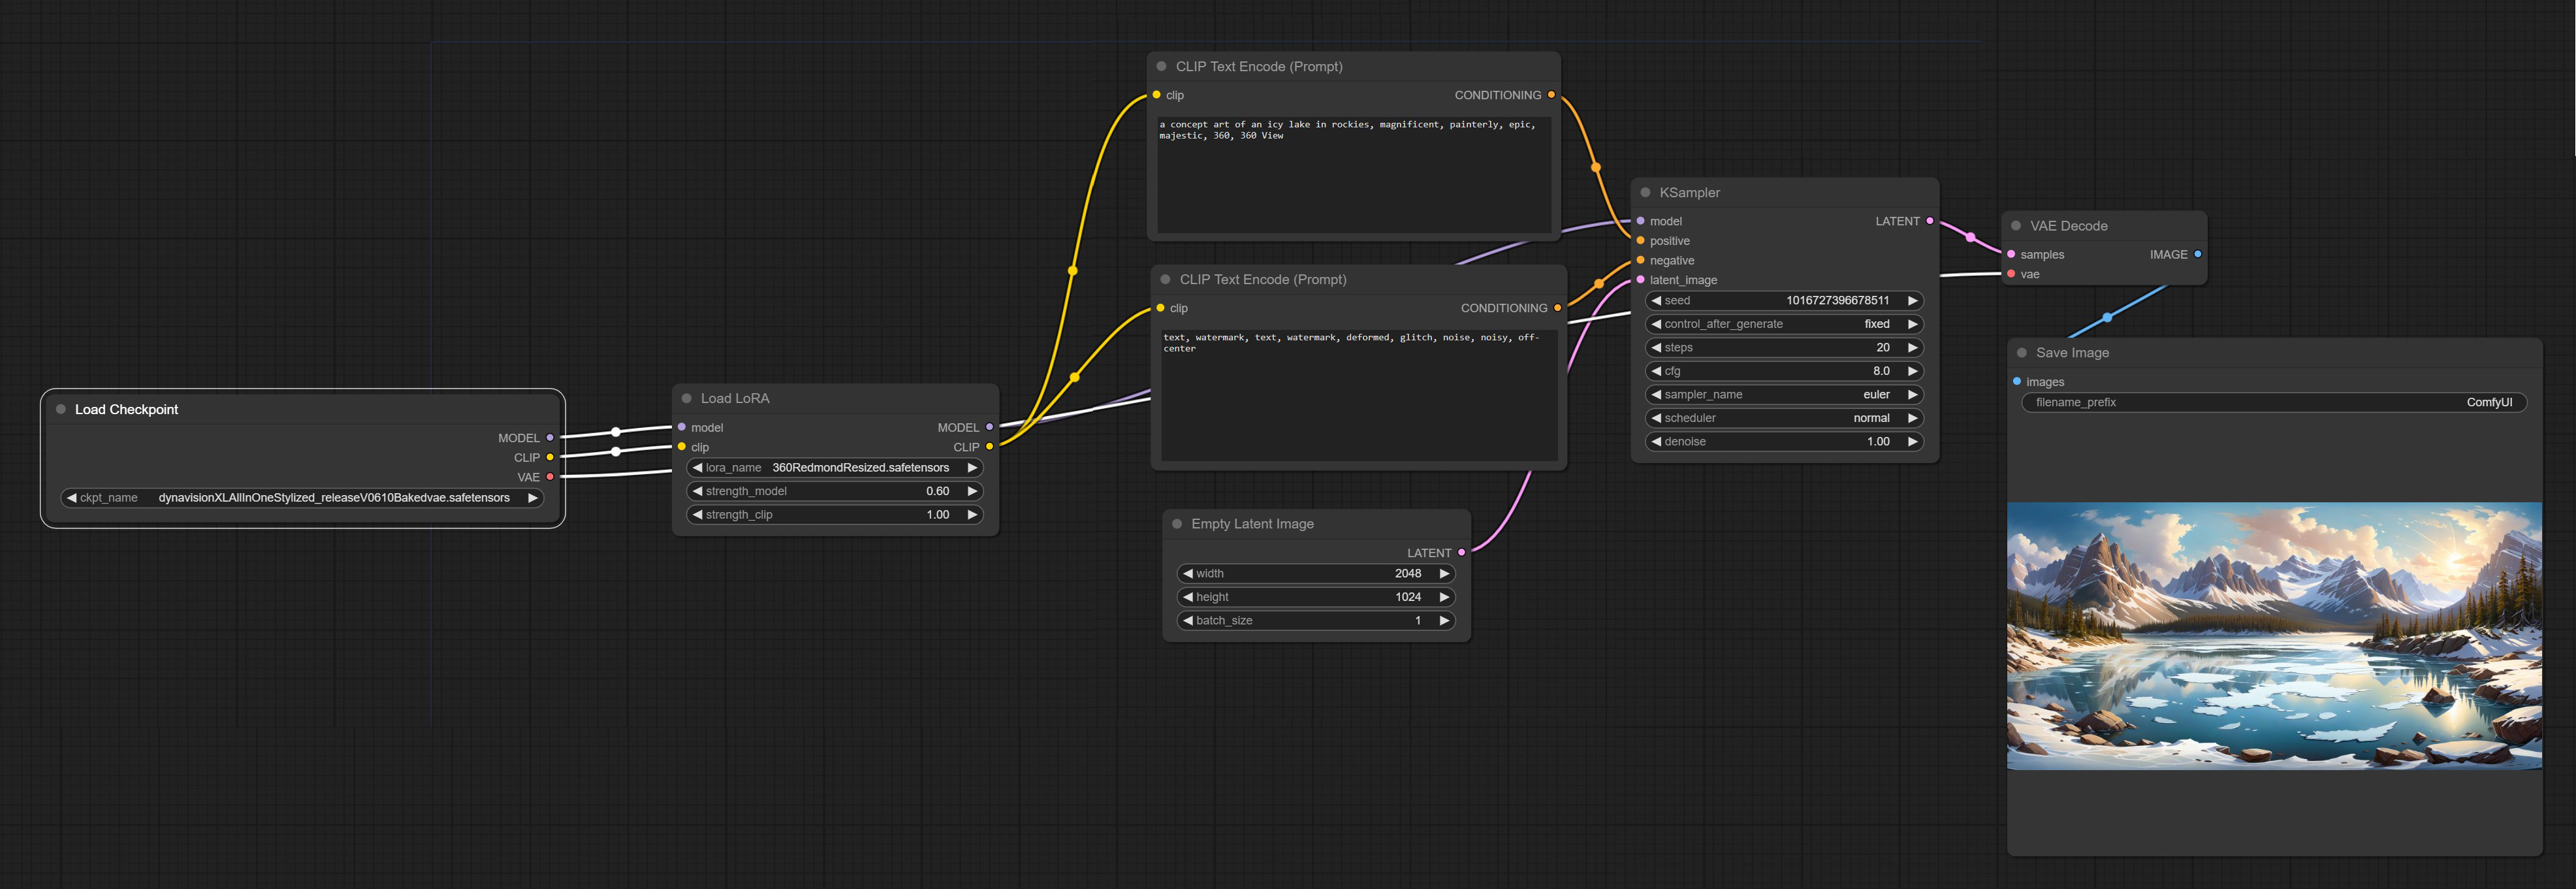
As you can see on the workflow, from left to right, it will load a model ( Load Checkpoint node ), then a positive prompt and negative prompt ( CLIP Text Encode(Prompt) node )will help the model to generate your picture. The empty Latent Image will describe the image’s size ( height x width ). KSampler will convert your prompt into an image based on different parameters ( you can find at the end of this tutorial link to learn more ). Then a VAE Decode and finally a Save Image node that shows the resulting image save it.
Adding a model
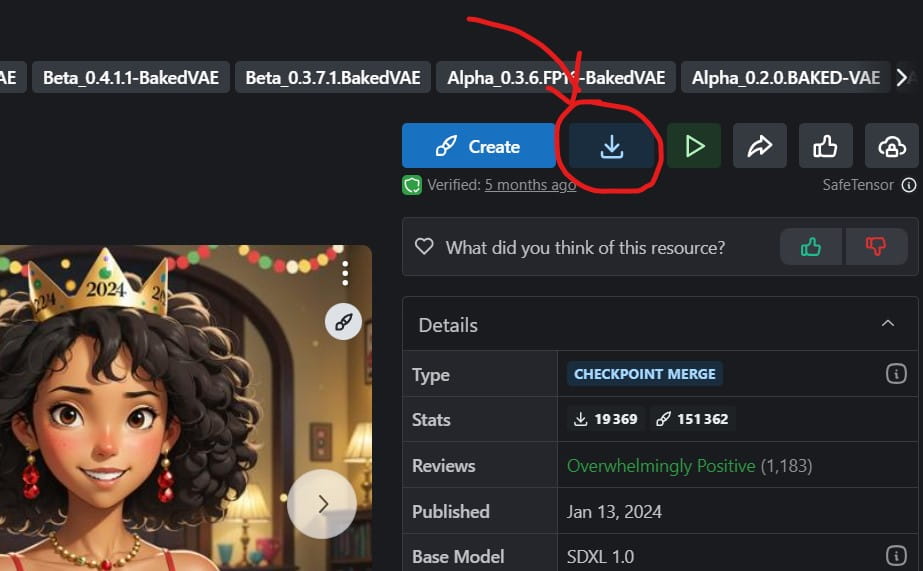
In this tutorial, we will choose a model on the CivitAI website. CivitAI is a community portal on stable diffusion models and images. It’s a good place to select the models you need depending on your favorite styles ( fantasy, science fiction, anime, photorealistic…). By looking at each model gallery you can learn which prompt and parameters they used, it’s a good way to learn.
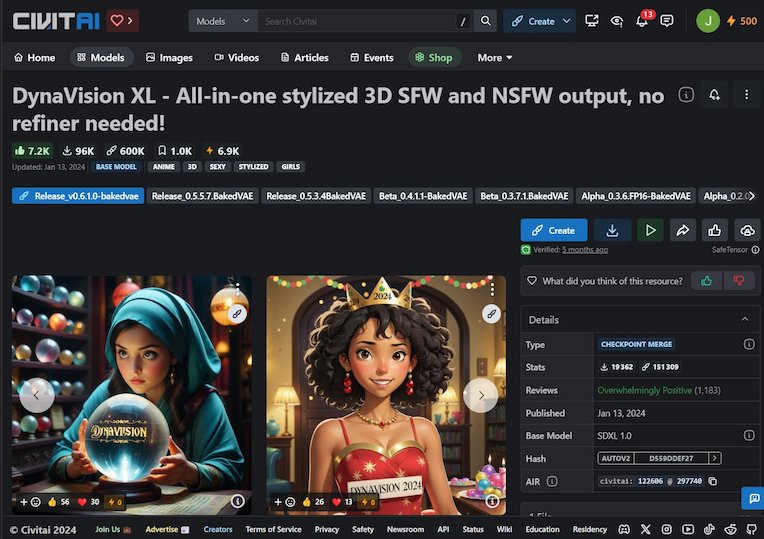
The model I chose for this tutorial is DynavisionXL, it’s an excellent model that generates images in the style of a 3D animation movie. The quality of the generated image is often stunning and clean. Feel free to test with another model once you finish this tutorial.
To download the model, click on the button download like below:
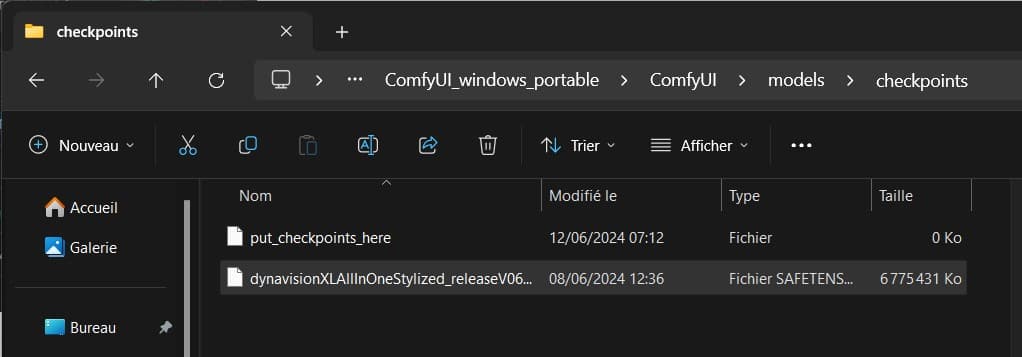
You have to put it now in a dedicated directory of your ComfyUI installation: /ComfyUI_windows_portable/ComfyUI/models/checkpoints/
Now restart your ComfyUI by closing the command window and launching again the run_nvidia_gpu.bat ( You should add a shortcut to your desktop )
Generate your first image
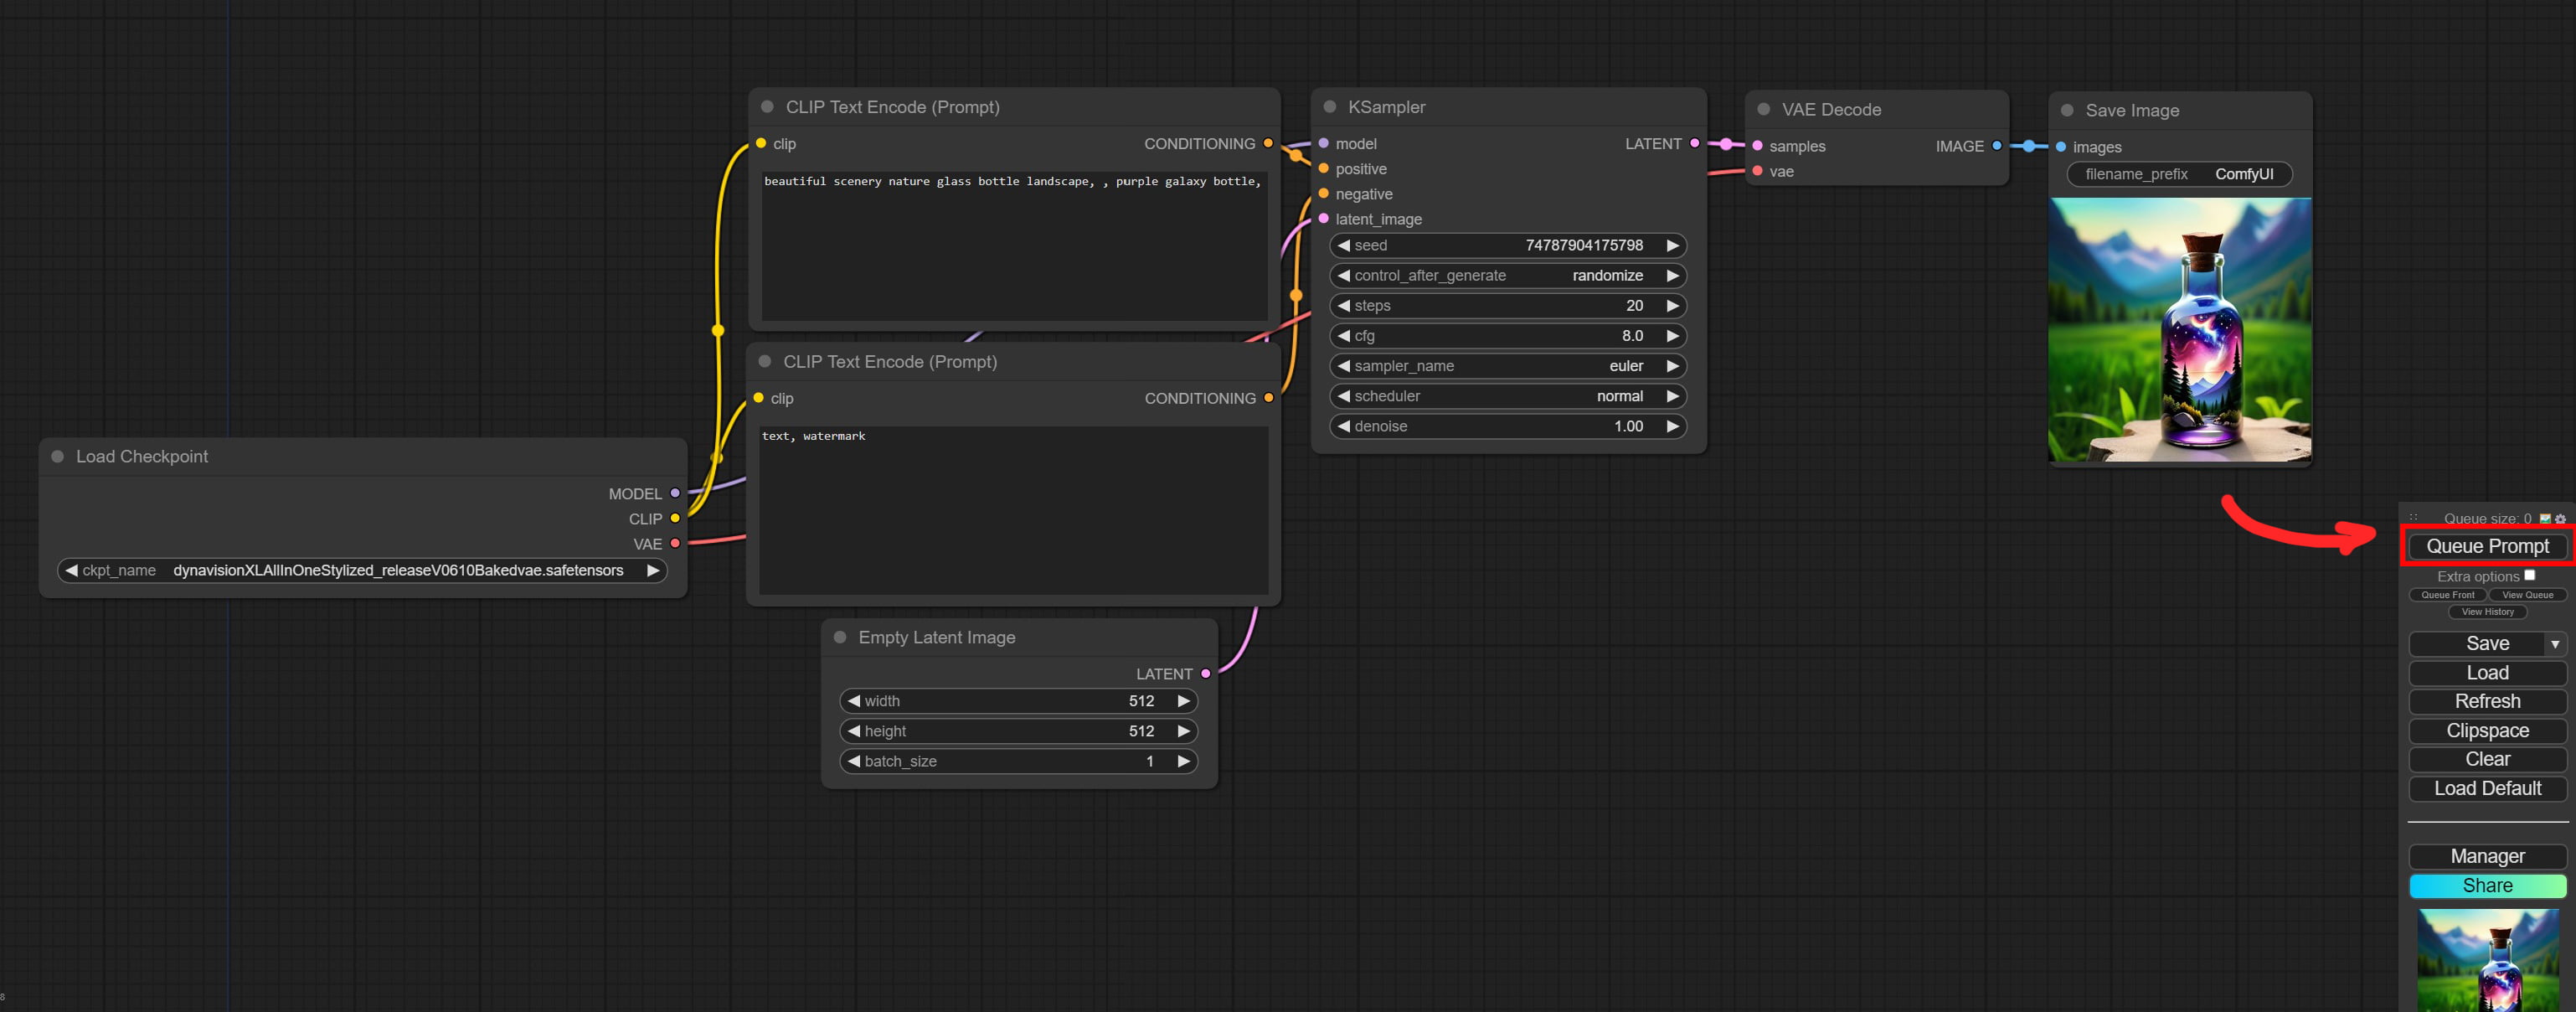
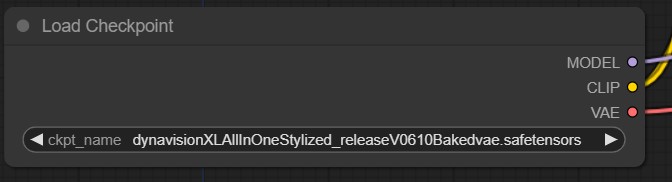
In the default workflow, you should be able to select the model called dynavisionXLAllInOneStylized_releaseV0610Bakedvae ( the name may be different at the time you read this tutorial as the model evolves) in the “Load Checkpoint” node.
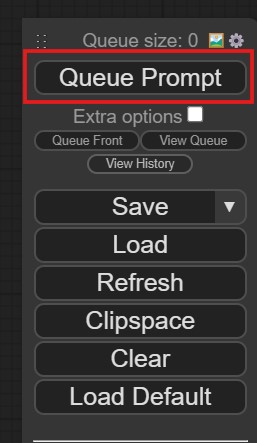
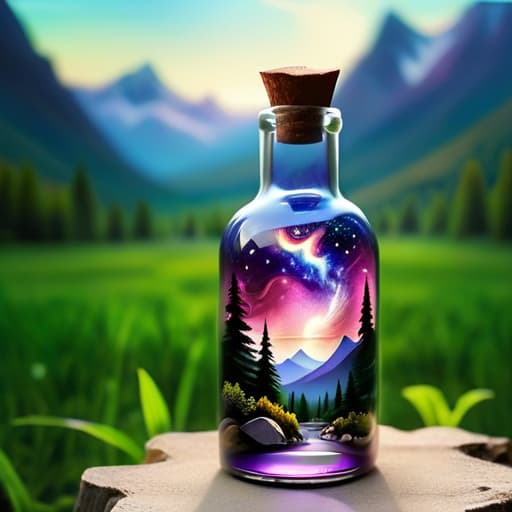
Next, click on the button “Queue Prompt”:
After a few seconds, you should see a picture that looks like the one below of a bottle with a landscape inside. Congratulations on your first AI generation in Stable Diffusion 🙂
You will find all the pictures you generate in the output directory of your ComfyUI project. ( /ComfyUI_windows_portable/ComfyUI/output/ )
You can already play by quickly making lots of beautiful pictures just by modifying positive prompt.
Make a panorama picture
Now that you have generated your first image, what must we do to make our first panorama image?
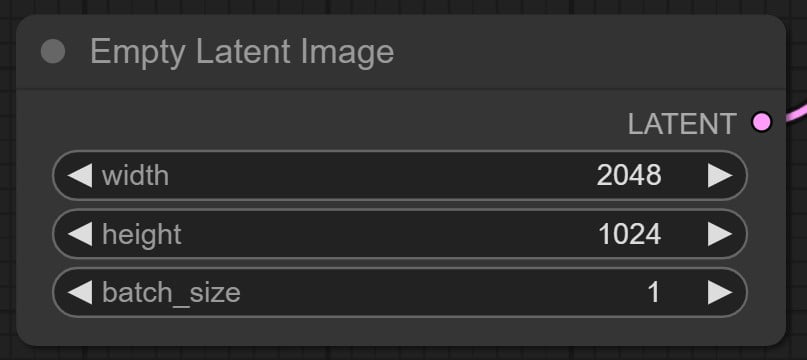
First, we need to enlarge the picture. Panorama pictures usually have a ratio of 2:1 between the length and height of the image.
So let’s try something like 2048×1024 by changing values in the “Empty Latent Image” node like below:
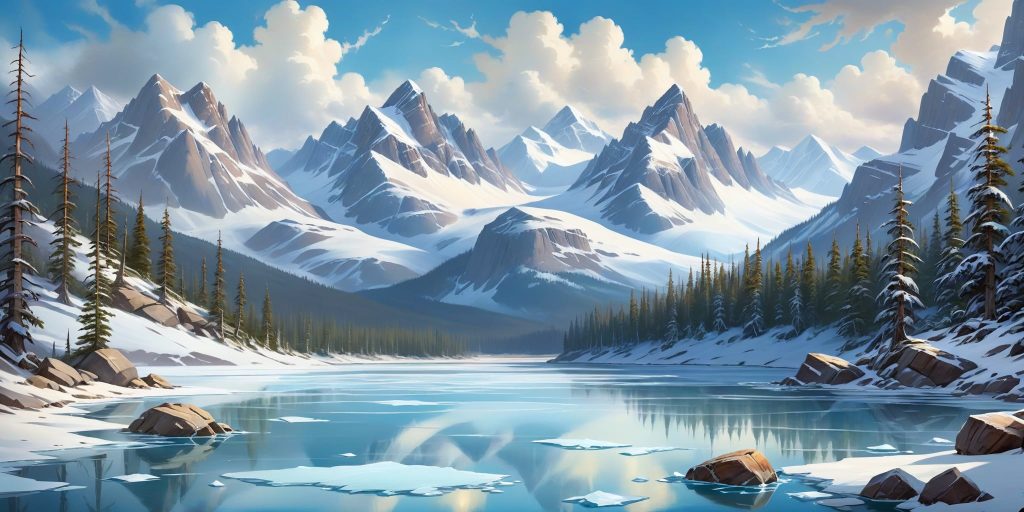
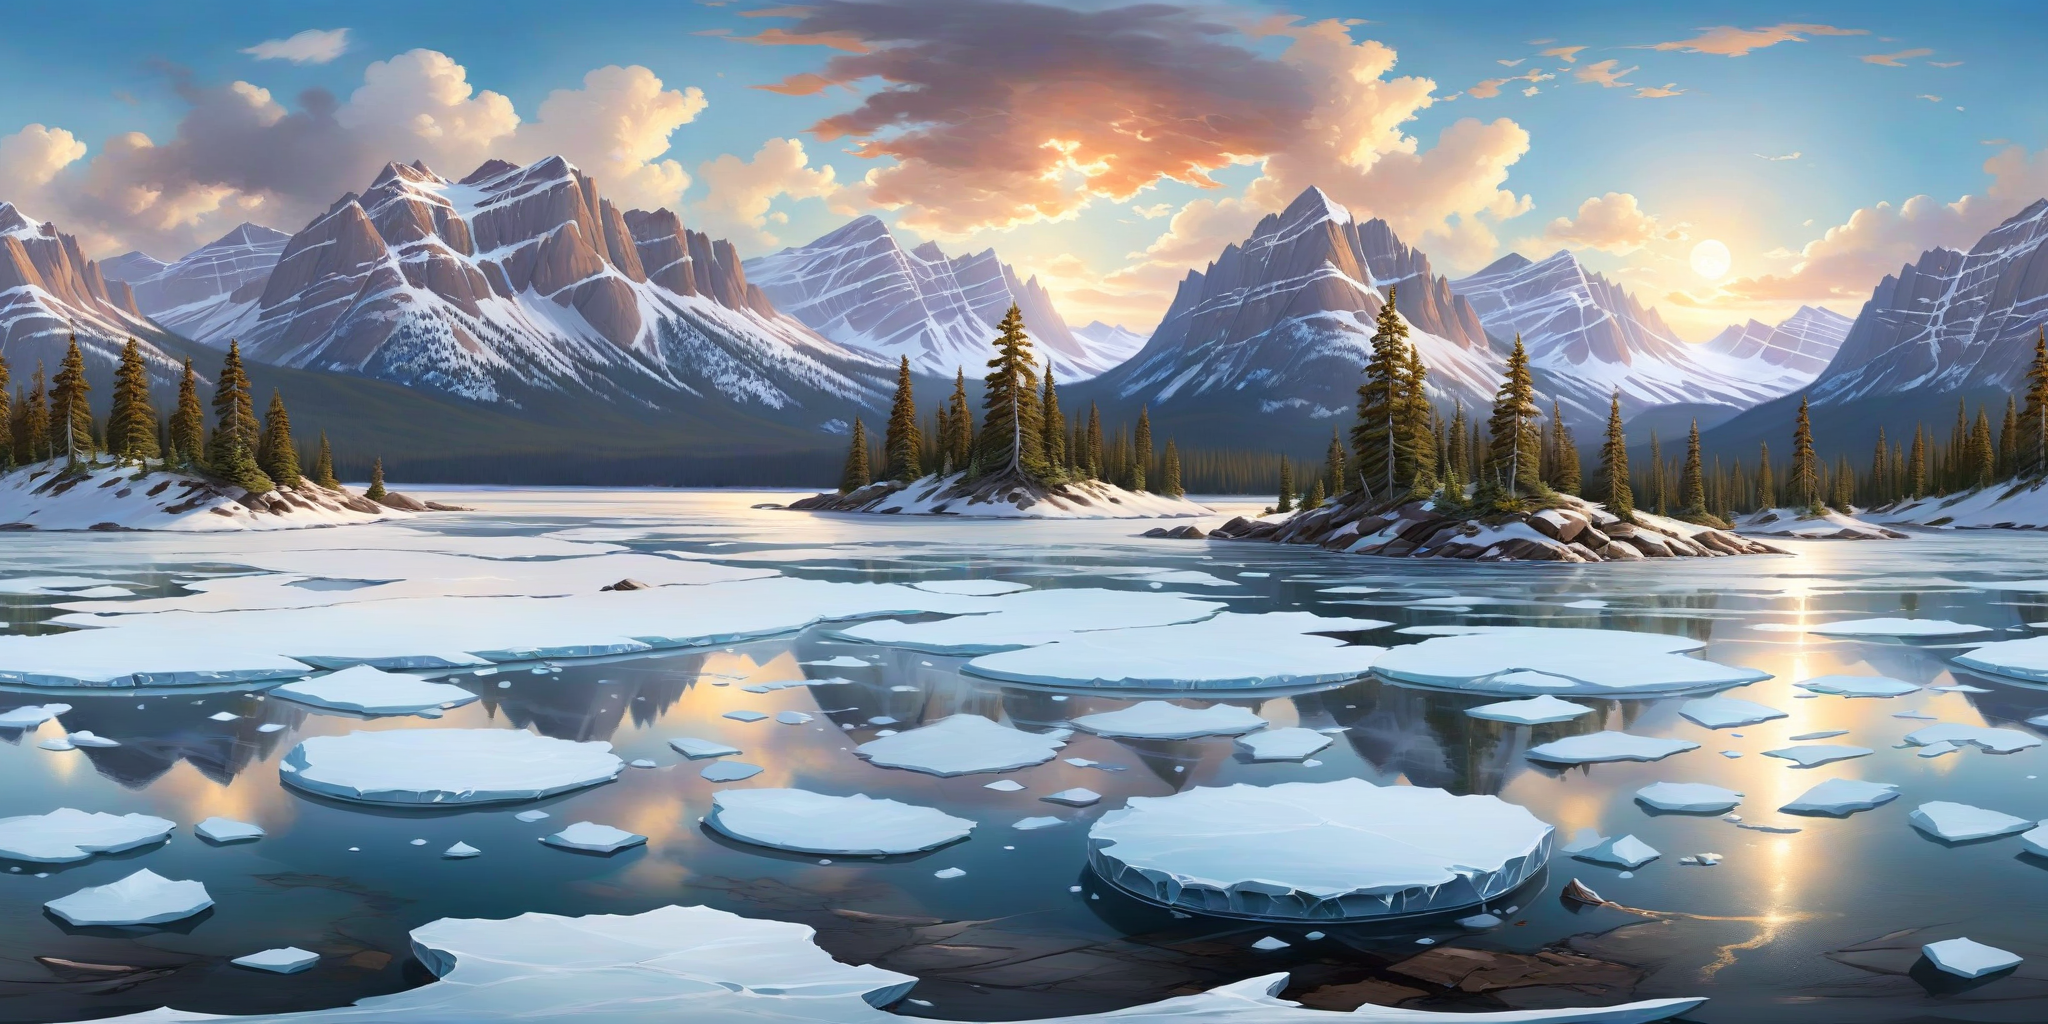
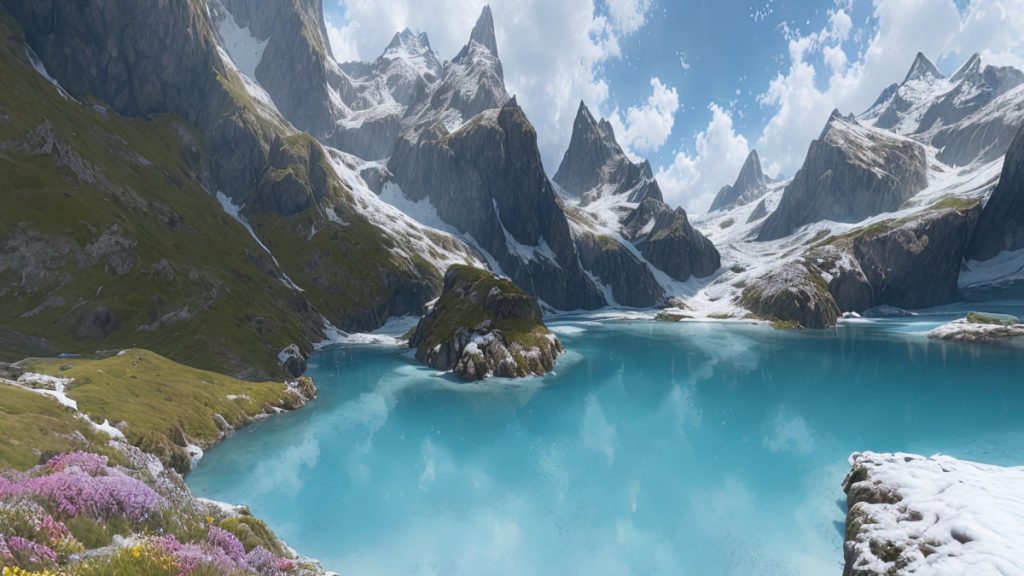
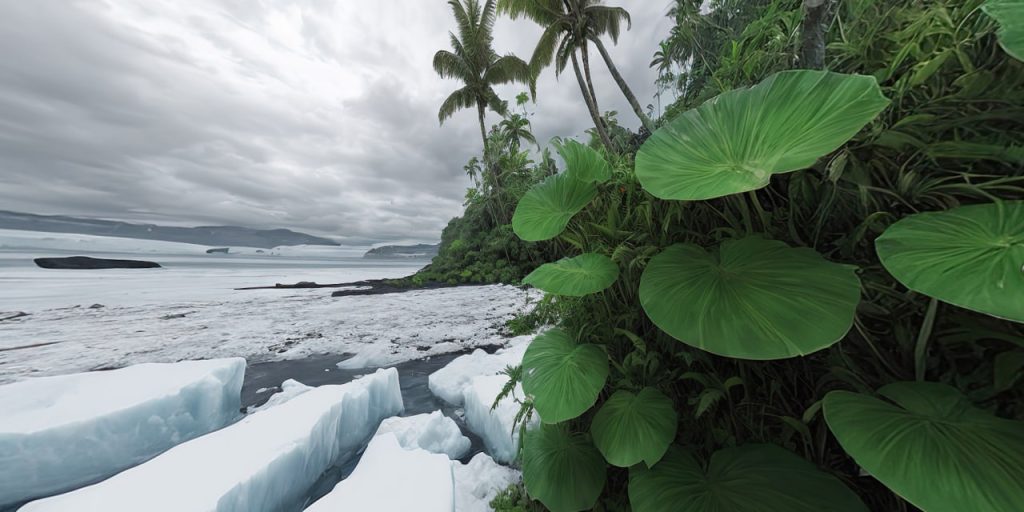
Next, change the positive prompt to make a beautiful landscape: “a concept art of an icy lake in rockies, magnificent, painterly, epic, majestic”
For the negative prompt: “text, watermark, deformed, glitch, noise, noisy, off-center, deformed”

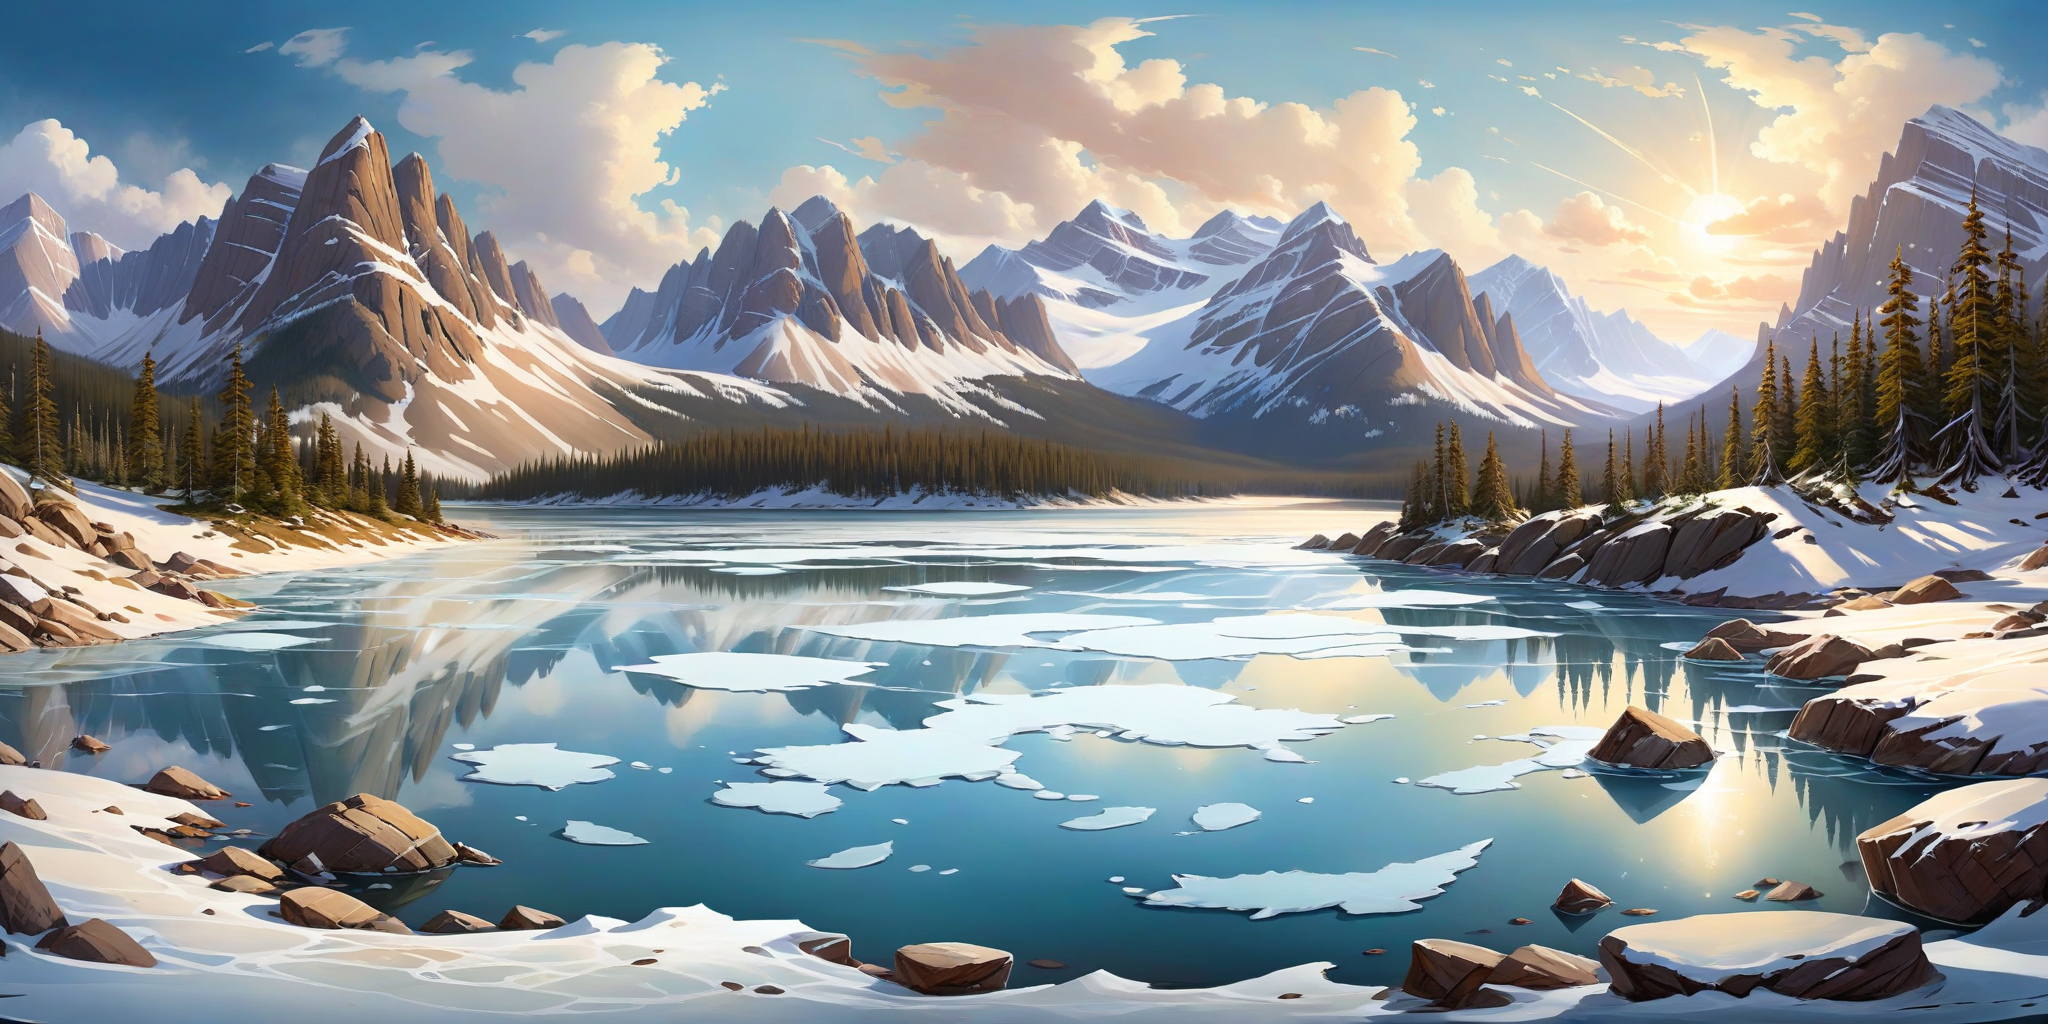
Click on the “Queue Prompt” button, and after a few seconds you should get an image like this one in the output folder of your ComfyUI:
 download this picture and drag&drop it to your comfyUI to get the workflow )
As you can see, it’s already a nice and beautiful panorama.
Preview on Panoraven
Let’s try to use it on a 360° panorama website like Panoraven. ( you will find a list of alternatives at the end of this post )
Panoraven is a great online website to see your flat panorama picture in 360° view. It’s smooth and easy to use with no watermark. It’s free for personal use.
Once you are on the main page, click on “TRY NOW” button.
Click on the “UPLOAD” button and add the panorama picture you create or drag & drop it.
After a few seconds you will see this screen:
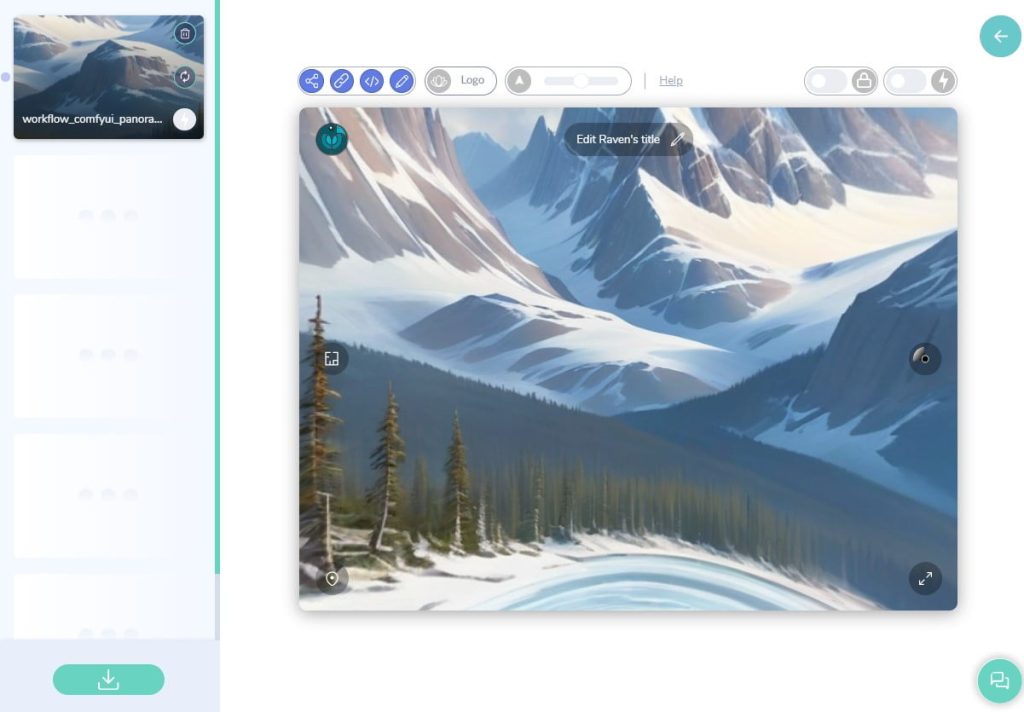
In the preview screen, hold the mouse and move to look all around at 360° degrees. You have a bunch of buttons to share your panorama, get the link, embed code etc… In the down-right corner, you have a full-screen button.
Panoraven preview: https://panoraven.com/en/embed/1QgA4qQlbJ
As you can see there are 3 main problems:
- it’s not fully 360 degrees: there is too much distortion when looking up or down.
- joining of left-right borders is visible
- the result is slightly blurred due to insufficient resolution

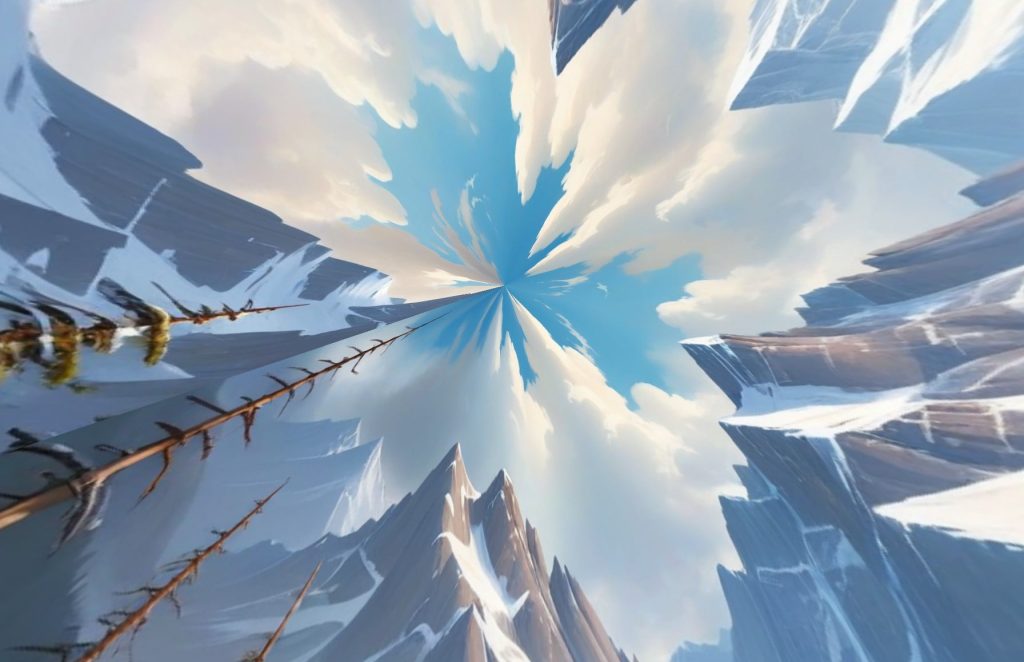
Let’s see how to correct it.
Use a 360° Lora
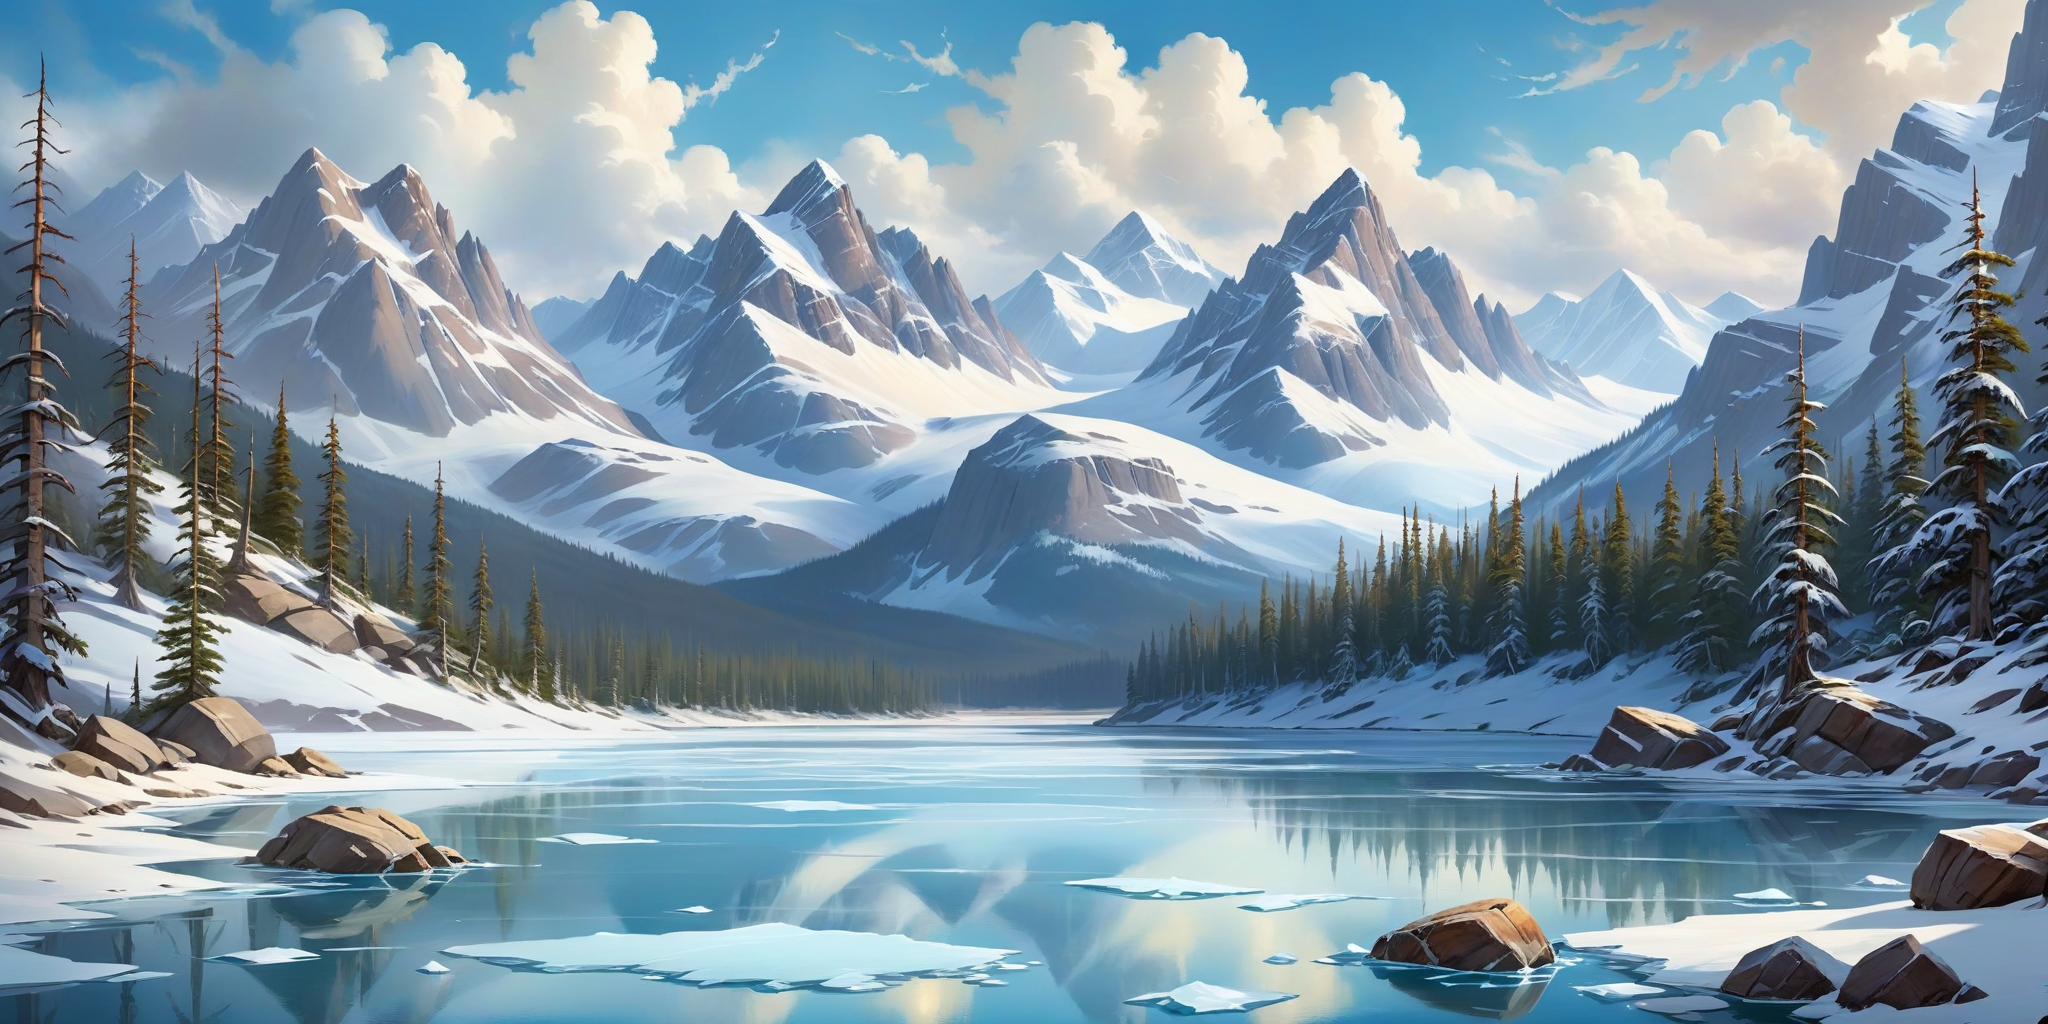
First of all, we need to make our picture look more like a 360 view, with the upper/down part of the picture stretched like the example below:
Looking at this picture in Panoraven, you will see that up and down are more nicely done because it’s stretched like a planisphere on the resulting image.
Panoraven preview: https://panoraven.com/en/embed/4ilLla5Q0s
Concerning our mountain panorama, we need to add a step to our workflow between the model and the KSampler using a specialized Lora to generate 360° images. Lora in Stable Diffusion provides an efficient and scalable way to fine-tune large pre-trained models, making the process less resource-intensive and more practical for various applications. Usually, Lora files are small compared to models.
Go to CivitAI and click the download button on the 360Redmond lora for SD XL 1.0 screen. ( about 400 Mo )
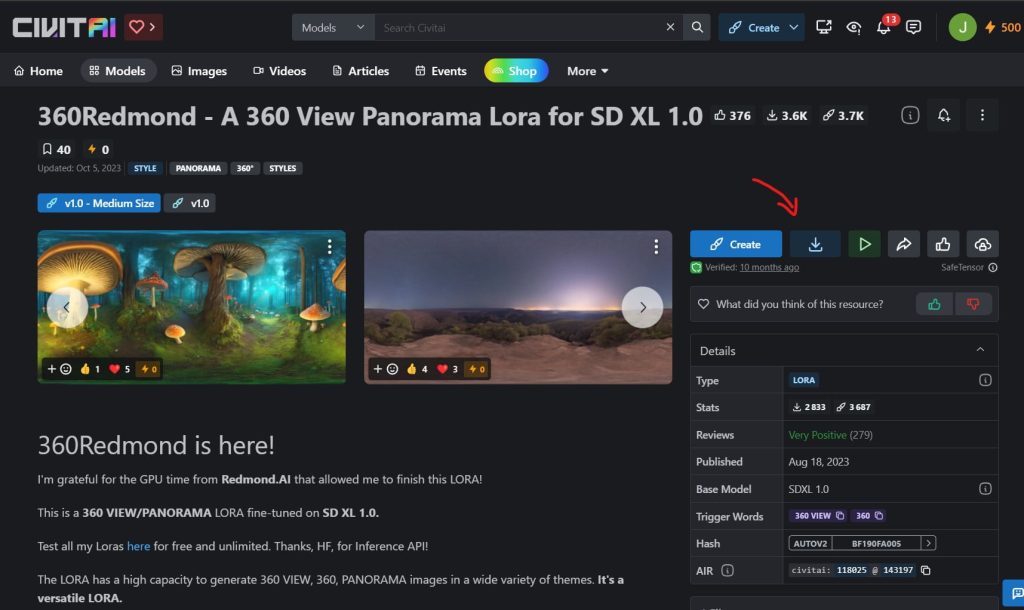
Copy the file into the loras directory of ComfyUI: /ComfyUI_windows_portable/ComfyUI/models/loras/
Restart your comfyUI local server. Double-click anywhere in your workflow to add a new node and search for “Load Lora” node.
Then choose the lora named “360RedmondResized.safesensors”
The following parameters work pretty well:
– strength_model : 0.60
– strength_clip : 1.0
To make the lora work better, some loras need trigger words to be written in the positive prompt. Here for the 360Redmond, the following trigger words are: 360, 360view
Click on the “Queue Prompt” button and see the resulting image:
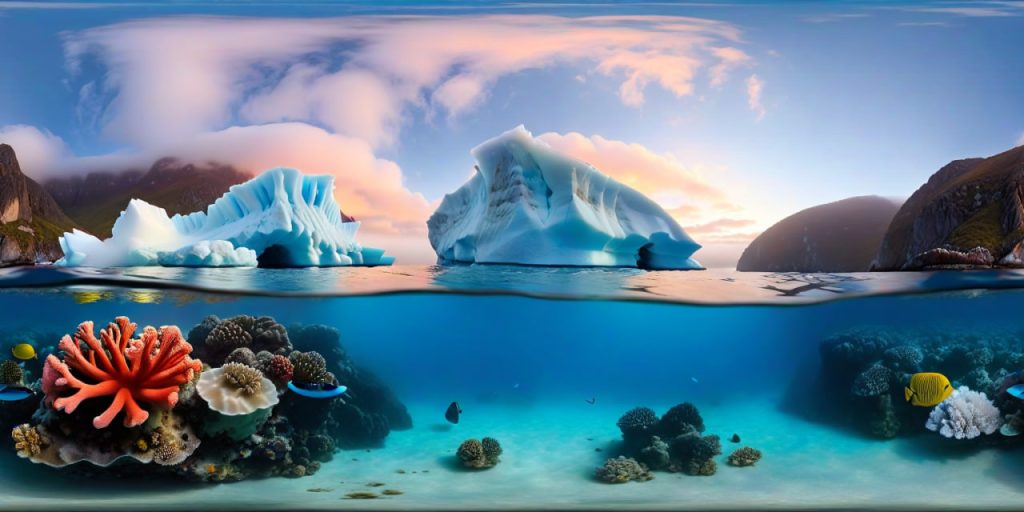
 download this picture and drag&drop it to your comfyUI to get the workflow )
Panoraven preview: https://panoraven.com/en/embed/xG1PwvahOf
As you can see in the panoraven preview, the up-and-down part of the 360° panorama has significantly improved. However, the image’s borders are too dissimilar and unrelated, making the break in the joins very noticeable.
In the next section, you will discover how to create a seamless border to ensure no visible joins.
Join edges
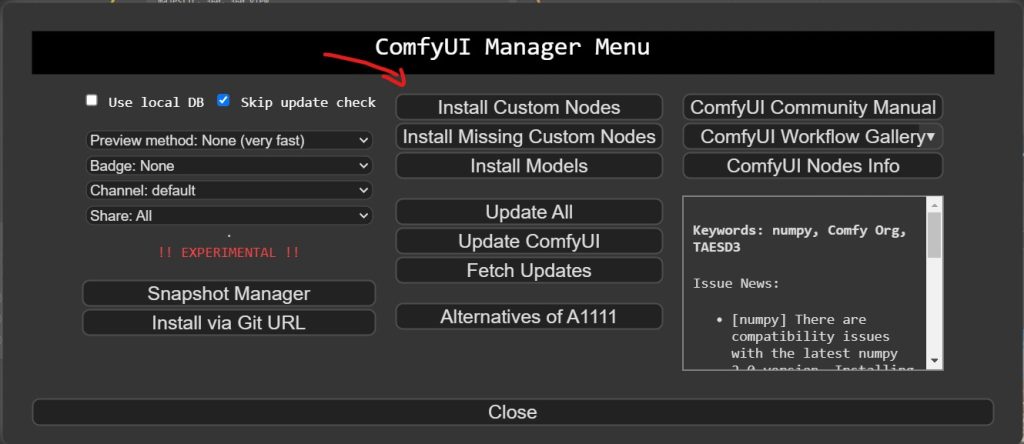
To make the borders invisible, we need to add two new nodes that are unavailable by default with ComfyUI. We must install a tool called ComfyUI-Manager. ComfyUI-Manager is an extension designed to enhance the usability of ComfyUI, to search, install, update and remove custom nodes, models etc… We will follow the installation instructions for the portable version of ComfyUI.
- Download scripts/install-manager-for-portable-version.bat into installed
"ComfyUI_windows_portable"directory - double click
install-manager-for-portable-version.bat
Restart your comfyUI local server and you should see the new button “Manager”
You have two choices:
– download the workflow of the picture below and let the manager install the missing two nodes which should be marked in red
or manually install by:
– click on “Manager” button > Install Custom Nodes > Search: Seamless tiling > Install
– click on “Manager” button > Install Custom Nodes >Search: Circular VAE > Install
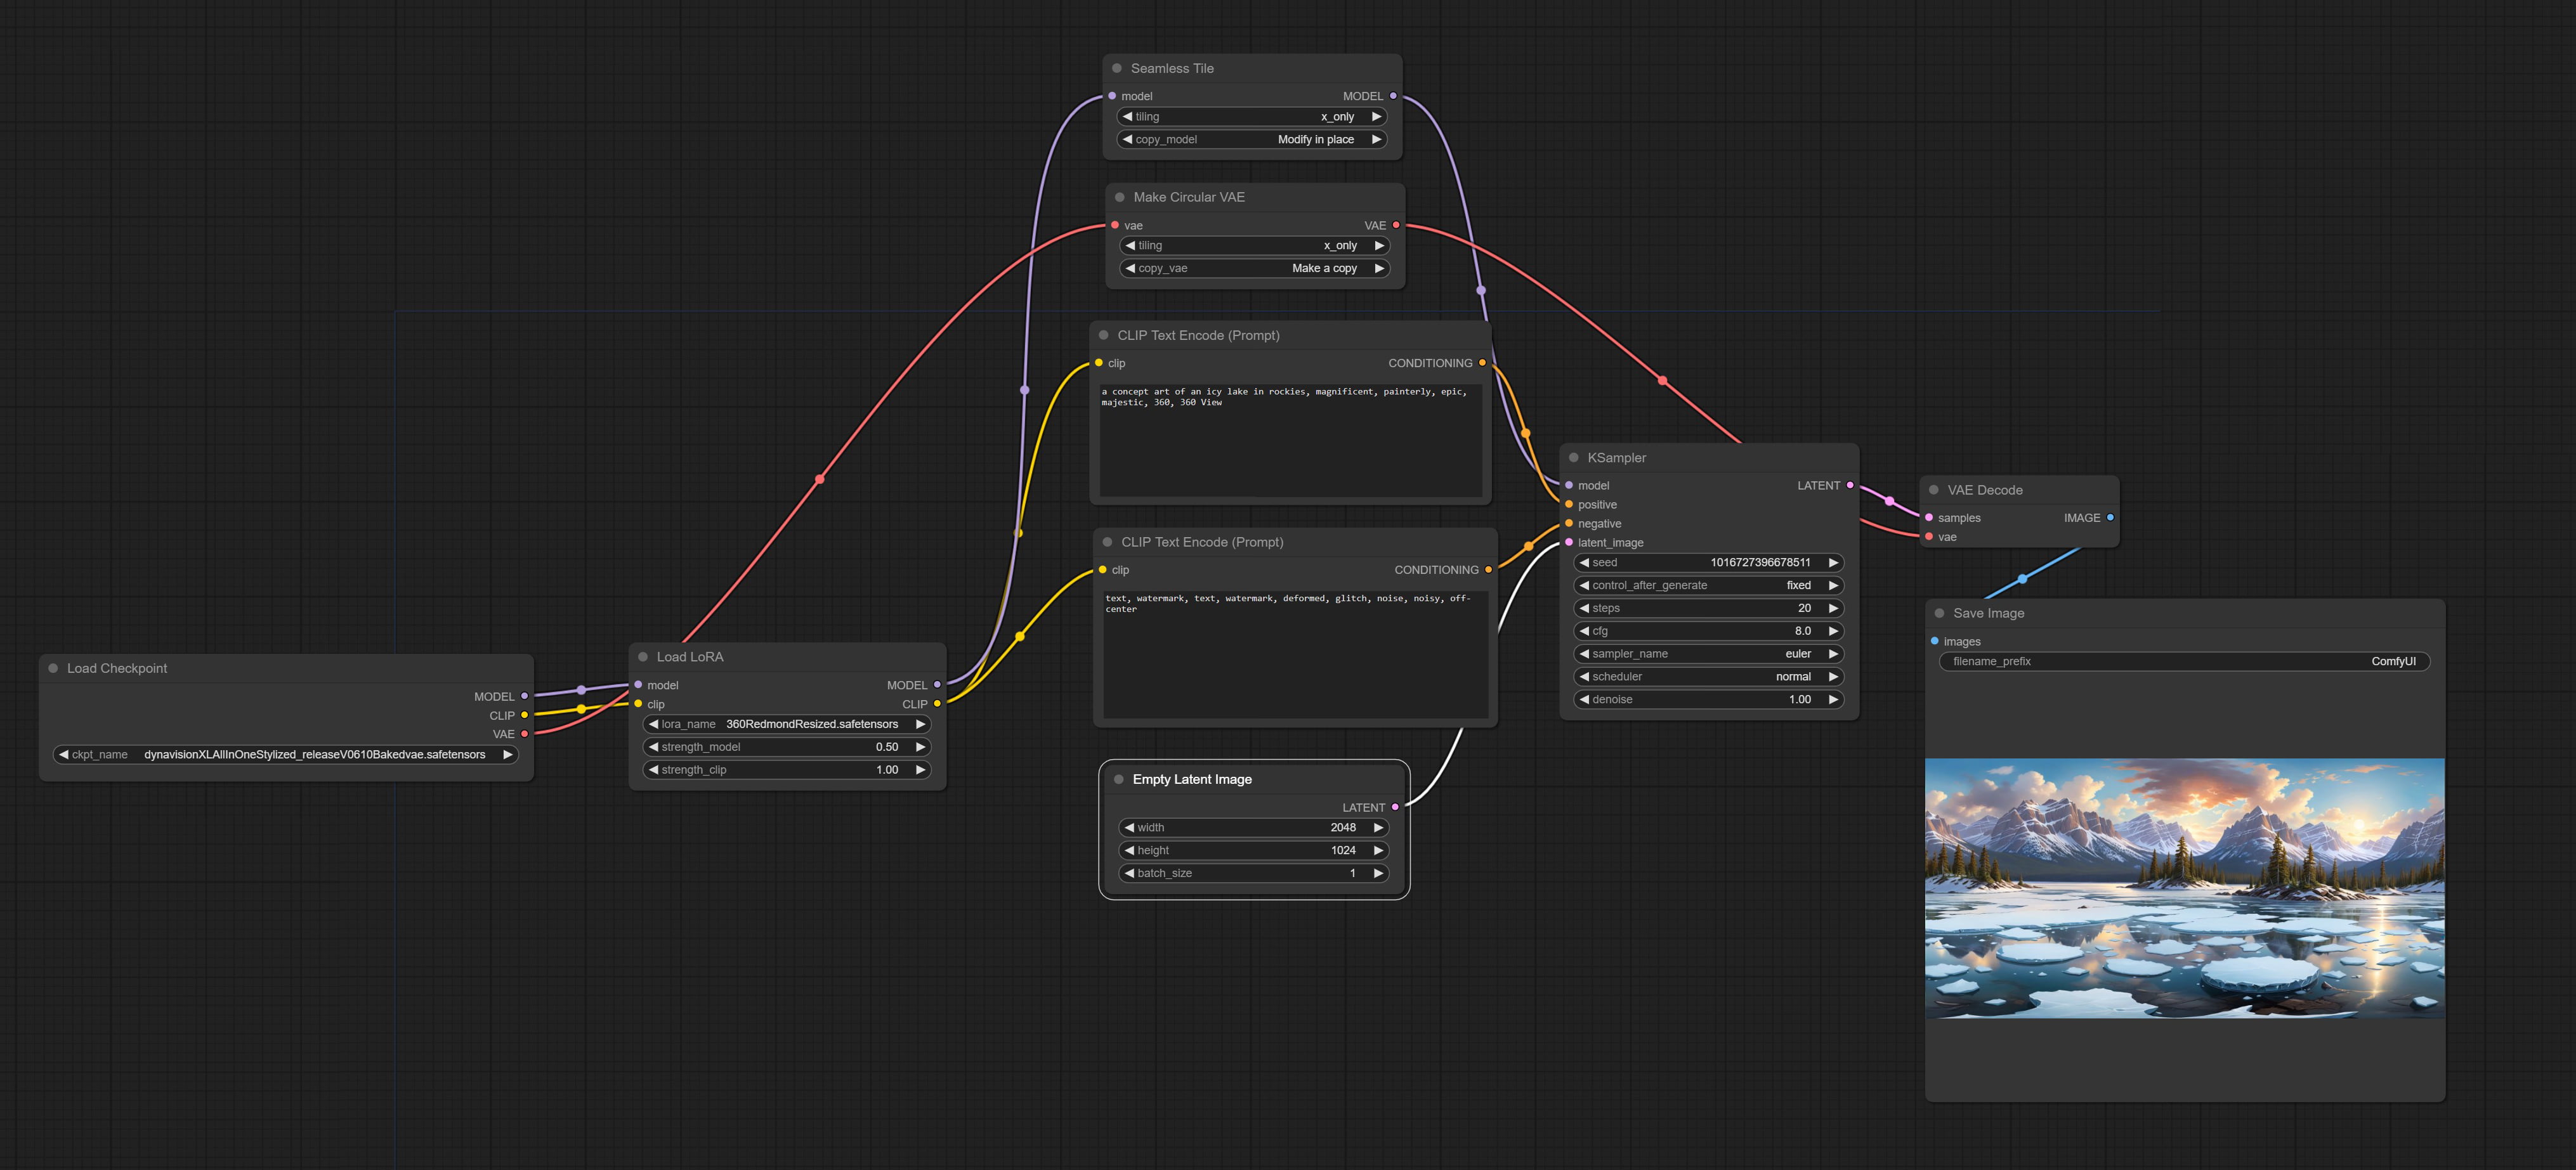
Double-click anywhere in the workflow to add a node and search for “Seamless Tile” and “Make Circular VAE node”.
Connect the load checkpoint VAE output ( red dot ) to the “Make Circular VAE” input ( red dot ) and then VAE output to the VAE Decode input.
Connect the Load LORA model output to the Seamless Tile input and then the model output to the KSampler model input
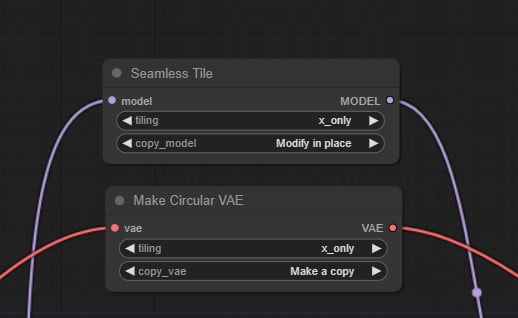
As you can see, the tiling is made only on the x_axis.
Here is the result you will obtain after using these special nodes:
 download this picture and drag&drop it to your comfyUI to get the workflow )
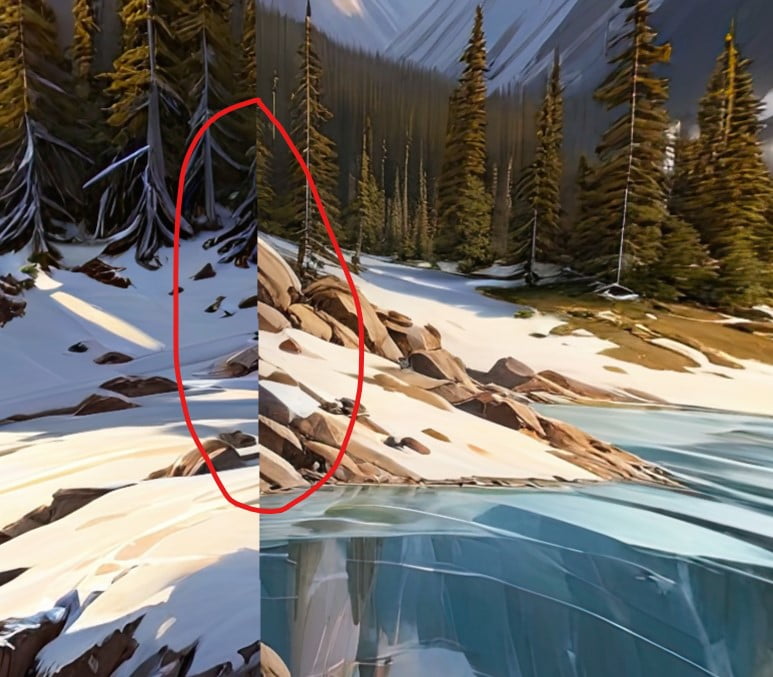
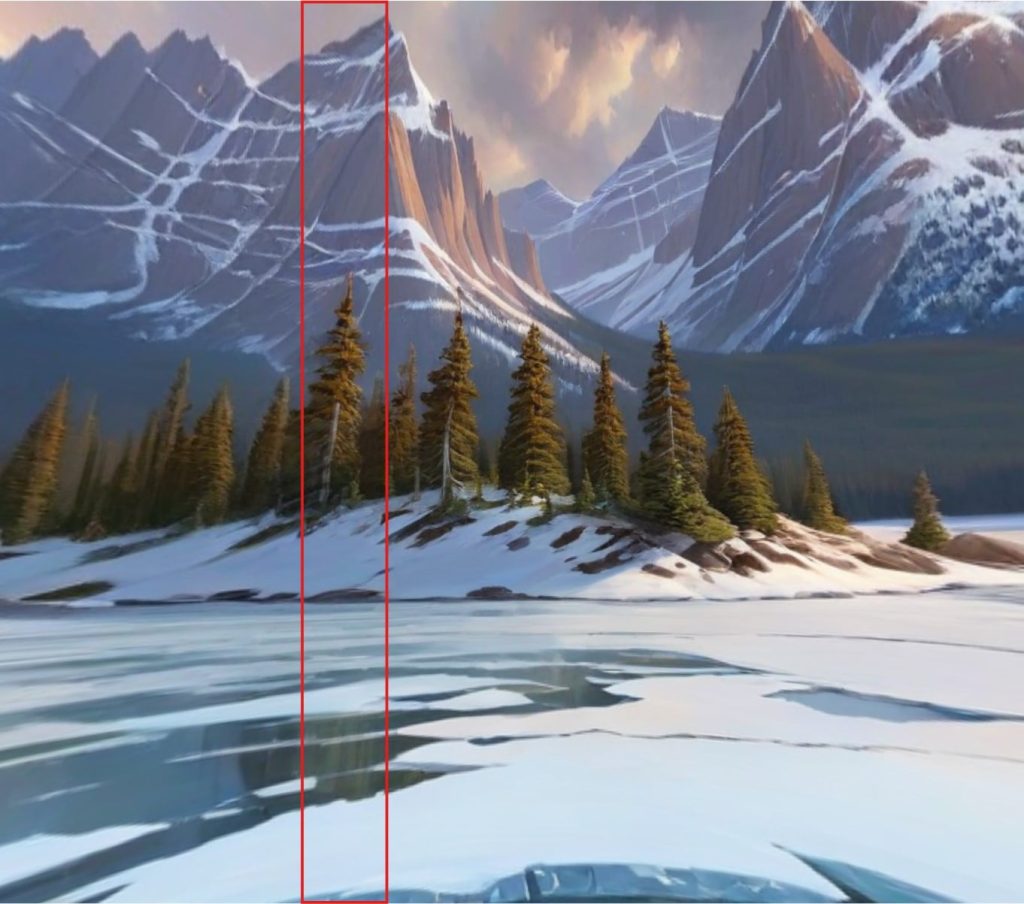
As you can see, the picture changes a little but also that the elements on the right corner are now well connected to those on left sides. For example, the mountain on the right is the same height as those on the left, same for the ice blocks and trees.
Panoraven preview: https://panoraven.com/en/embed/pQTYLkxW6Q
If you set the parameter “Control_after_generate” to “randomize” in the KSampler node, it will be different each time you generate an image. I usually generate several pictures and choose the one I like. You can click on the “Queue Prompt” several times to add to a queue list.
Now we are just one step away from a perfect image. To make the generated image less blurry, it needs a higher resolution.
Increase resolution ( upscaling )
Increasing the resolution also called upscaling is another important part of creating a stable diffusion image. As you know, images generated are often low-resolution pictures. It needs to be more detailed, especially 360 panorama which looks blurry even with 2048×1024 pictures.
We will see 3 methods to achieve it:
Upscaling within ComfyUI
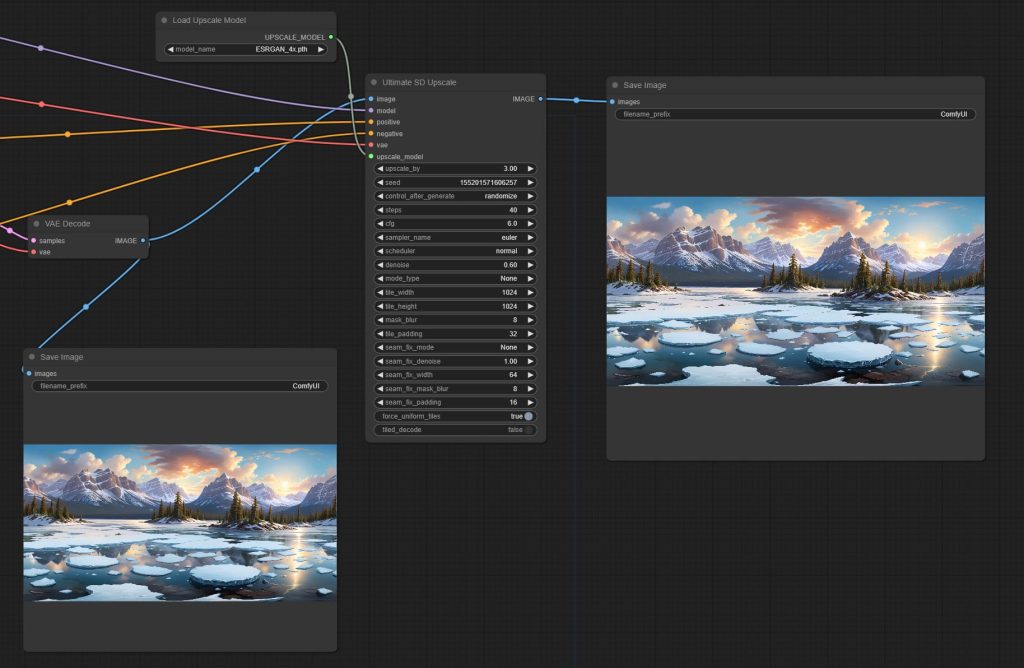
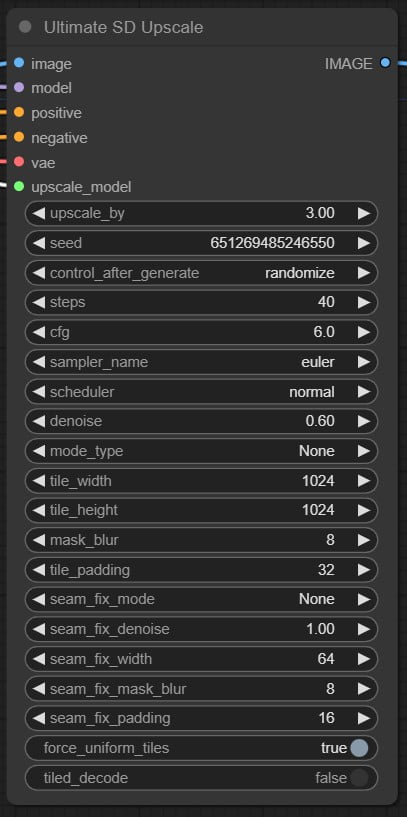
Upscaling in ComfyUI consists of adding a Load Upscale Model node and an Ultimate SD Upscale node after the VAE Decode step from the previous workflow. We will use a 3x factor to scale the resolution from 2048 x 1024 (3 Mb) to 6144 x 3072 (25Mb).
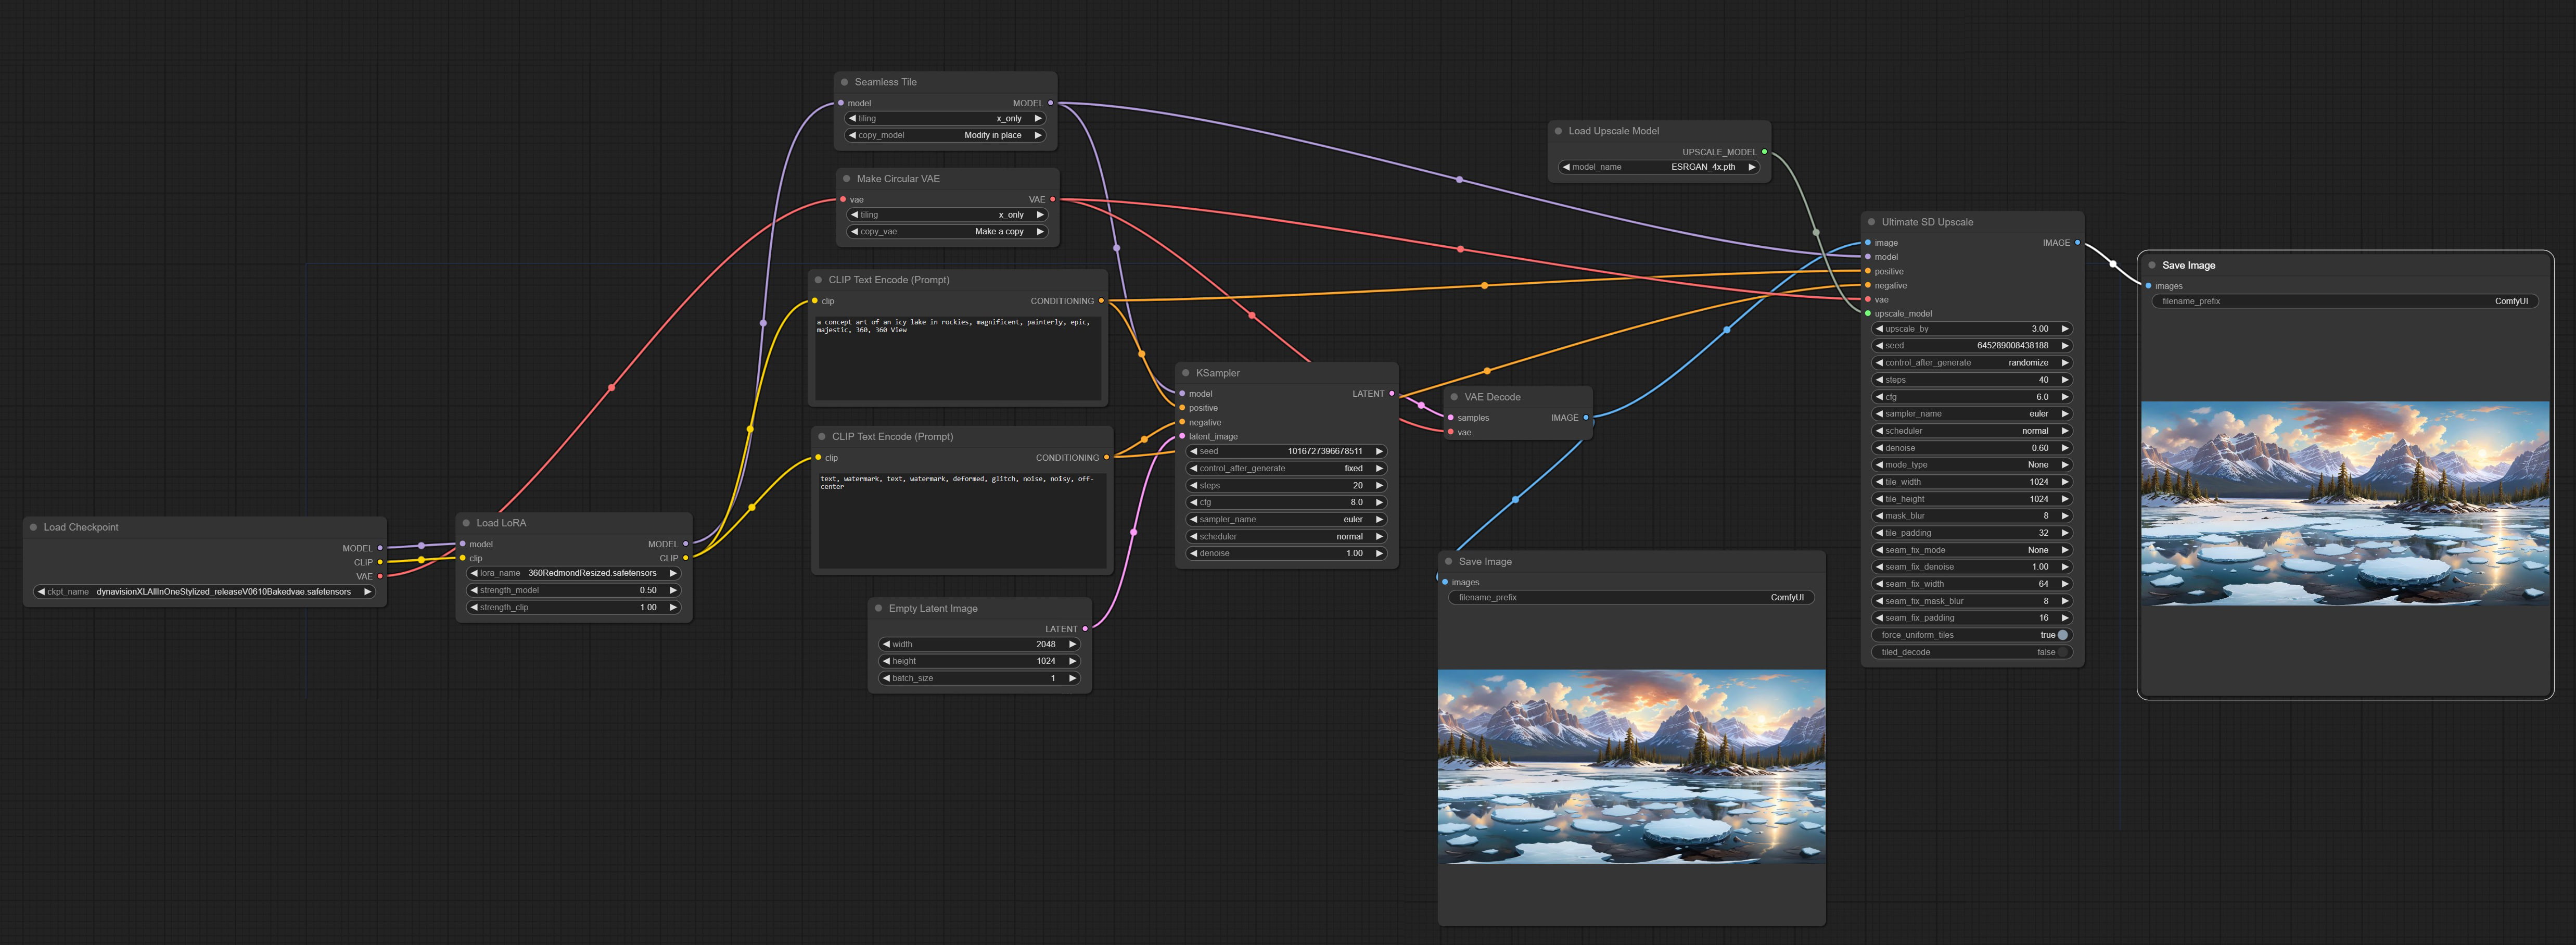
 download the picture of this workflow, drag&drop it on your comfyui, and install missing nodes if needed )
To do this we will use the Manager.
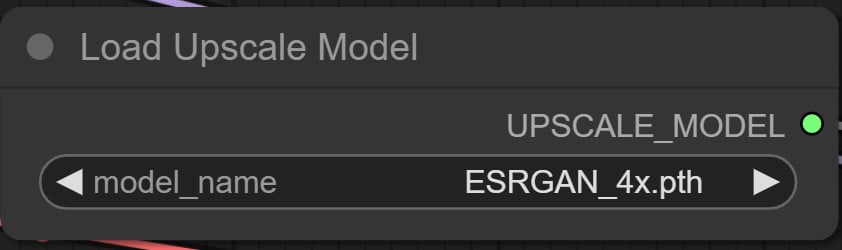
Click on “Manager” > Install Models > Search > “ESRGAN x4”
Choose the one whose filename is: ESRGAN_4x.pth
Click on the Install button.
You need also to install the node Ultimate SD Upscale:
Click on “Manager” > Install Custom Nodes > Search > “UltimateSDUpscale”
Click on the Install button.
Restart your local ComfyUI server.
Double-click inside an empty place inside your workflow to add the following nodes:
- Load Upscale Model.
- UltimateSDUpscale.
Select on the list of “Load Upscale Model” the model “ESRGAN_4x.pth”.
Connect the output Image from VAE decode to the input Image of UltimateSDUpscale.
The size of the final picture could be too big for Panoraven ( 30 Mb max per picture ), so try to reduce it with an online tool like Squoosh. It would be more fast to load also. I usually export to jpeg with 95% of quality.

So from the upscaling image of 25Mb Squoosh reduce it to a jpeg image of 5 Mb 😎
Online upscaling tool
Another option to upscale your image is to use an online service like https://upscalepics.com. From your 2048×1024 picture, you can increase the size by 4x.
It’s a free service ( for the first 4 images ) which result is pretty good.
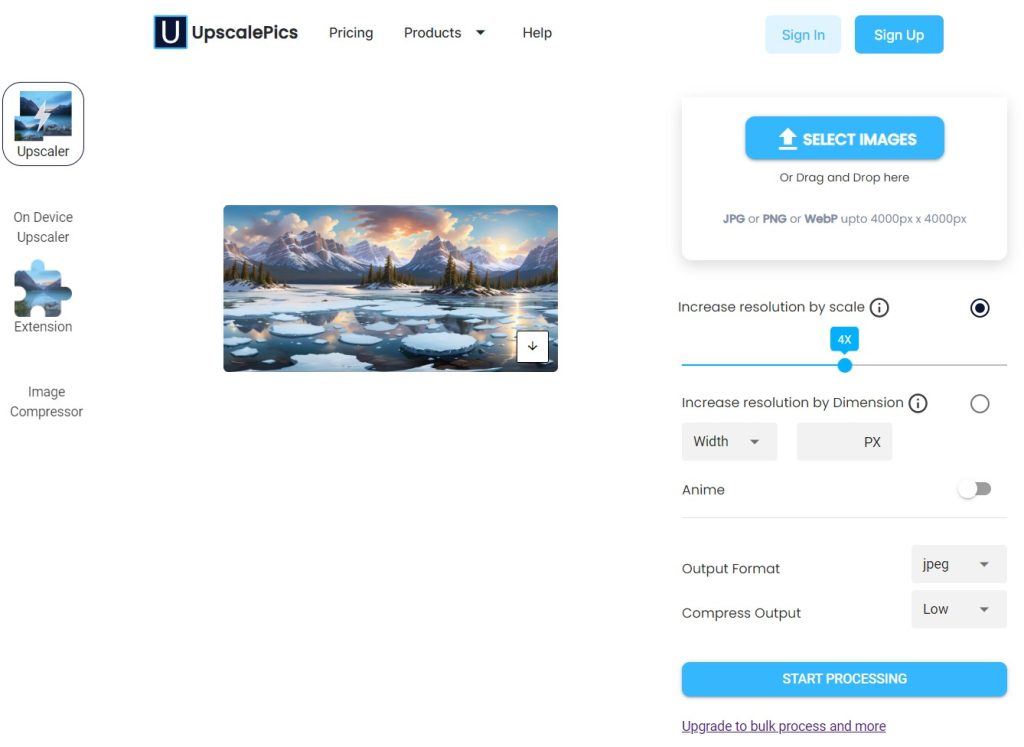
The export result is 8192 x 4196 ( 3 Mo ) in .jpeg format.
Preview in Panoraven: https://panoraven.com/fr/embed/Ol9i2HKFXr
List of other free online services:
- https://imgupscaler.media.io/app/upscaler Image Enhancer, up to 8x. ( Free for the first 3 images )
Dedicated software
Another option is to use specialized tools that only do upscale, like GigaPixel from TopazeLabs. I use it a lot because the upscaling time process is swift and the result is superb. It has various AI options such as Standard mode, Art&Cg, or Low res, and it automatically detects the required amount of sharpening and noise reduction for optimal upscaling.
If you are using other tools and want to share, please let me know in the comment section. Thanks!
Conclusion
Bravo! 🎉👍🏆
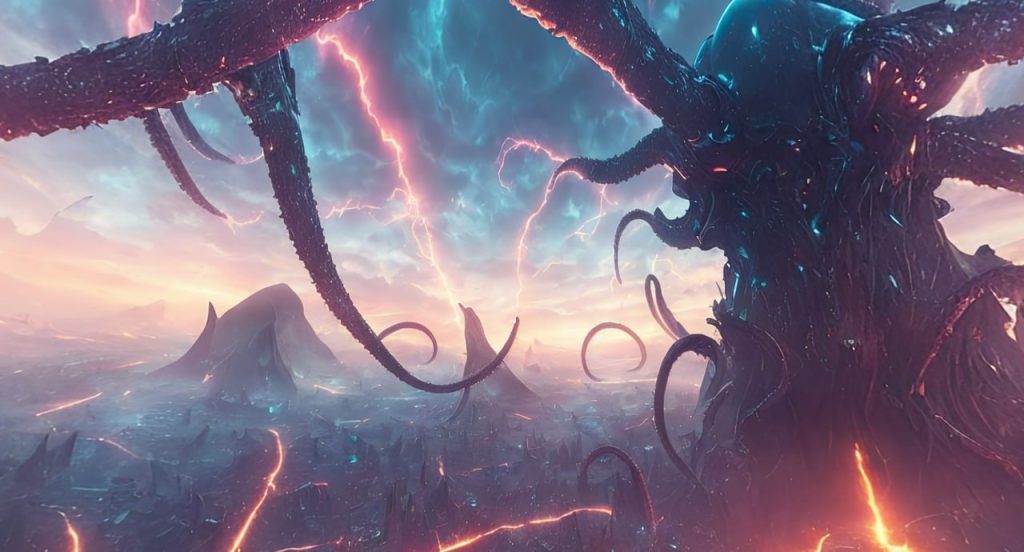
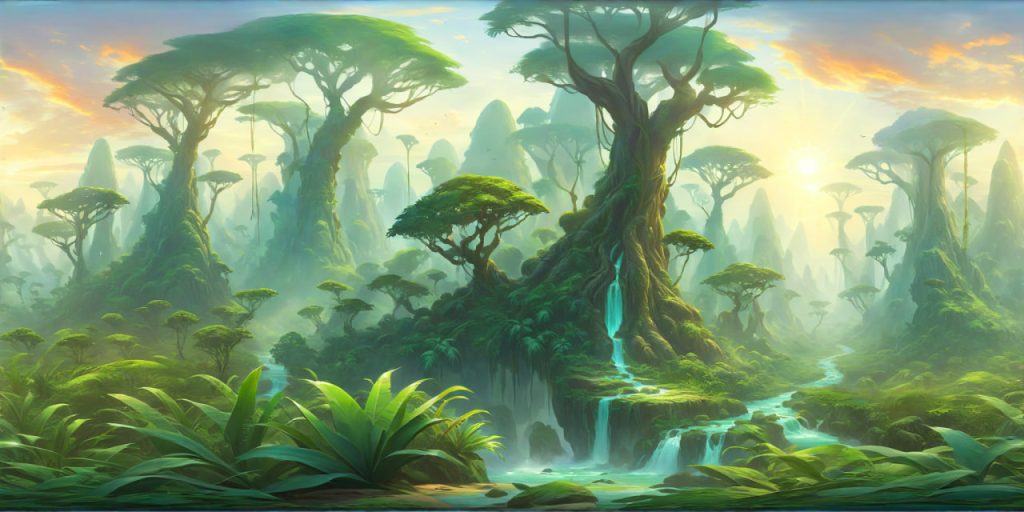
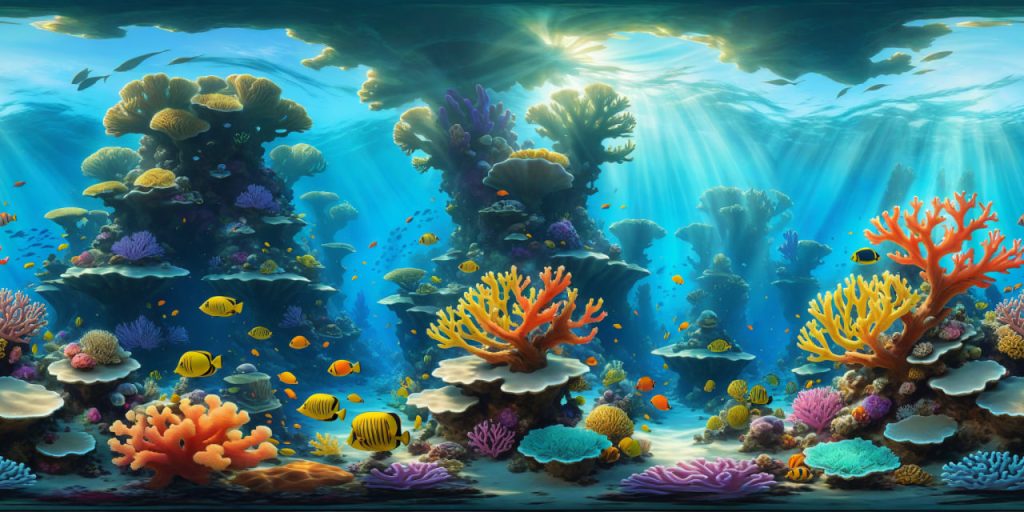
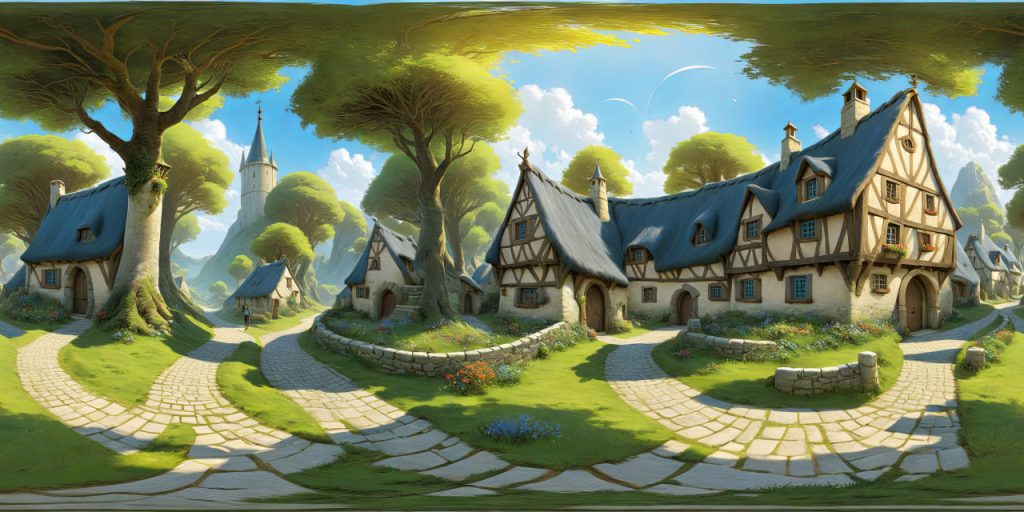
You reach the end of this tutorial! Now you can change the positive prompt to unlock unlimited panoramas, your imagination is the limit!
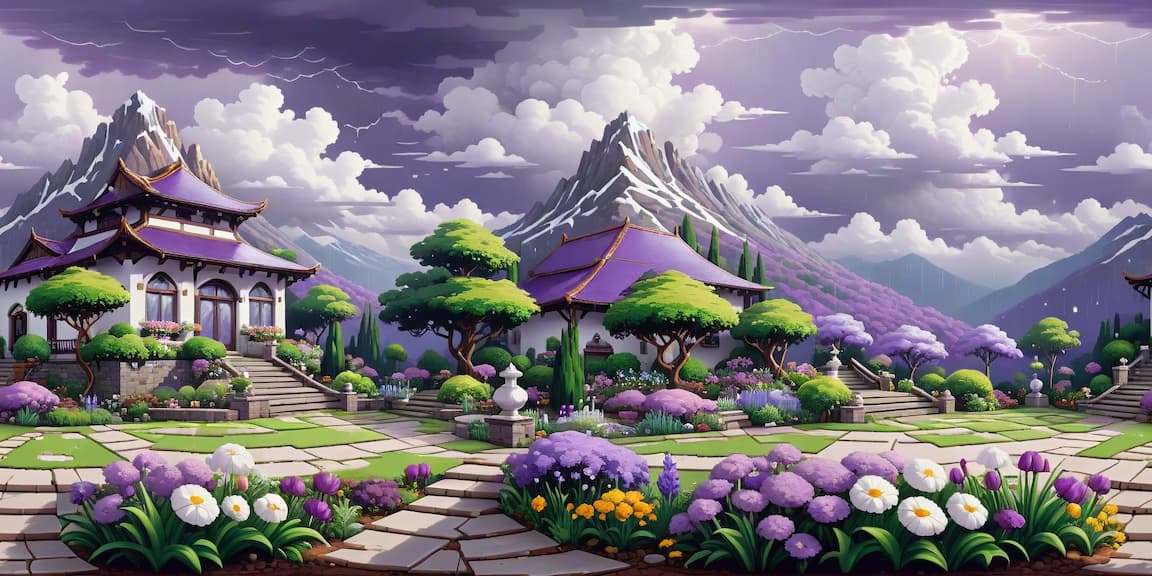
Here are some examples:
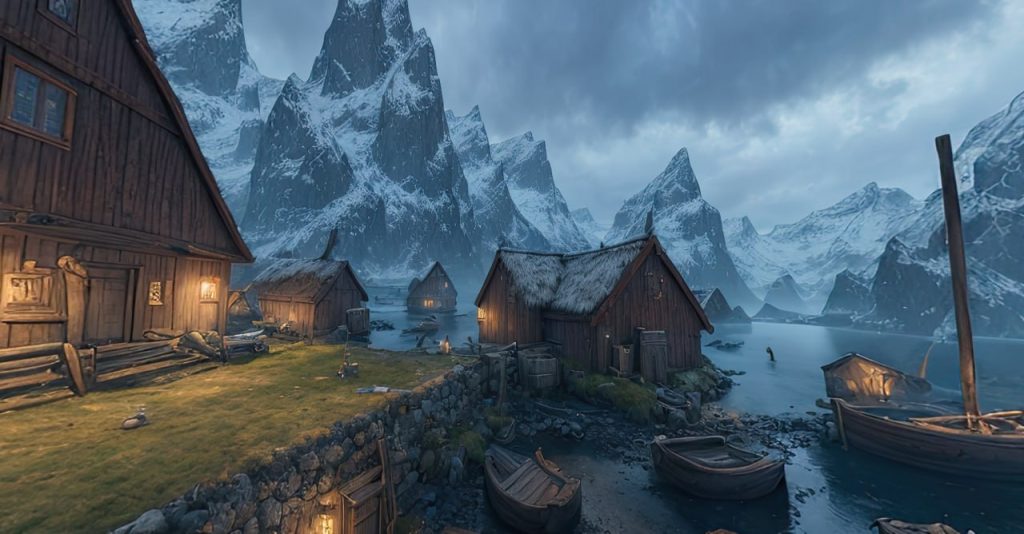
– a medieval fortress on a snowy mountain
– viking houses near a dark forest
– a mushroom village
– diving into the abyss, luminescent creatures
– depth of field, macro photography of tiny wild garden
I know it could be complex at first, so take your time, play with the tool, and come back to try new chapters once you are more familiar. Let me know if you need more details or show some of your creations in the comment section.
Here are links to the workflow of the tutorial:
workflow for a simple panorama
workflow for a panorama with 360 lora
workflow for panorama with 360 lora and joining border.
workflow for panorama with 360 lora and joining border and upscaling
Here is a list of SDXL Models that work well with the 360° Lora :
If you find some nice others models and want to share leave a comment!
🤩 🤩 🤩 🤩 🤩
Bonus
Here is a long prompt that will give you an unlimited mix of panoramas, each word between curly brackets and separated by pipe will be chosen randomly by ComfyUI, making each generation a surprise :
a {concept art| pixel art | digital painting | unreal engine render} of a {green|yellow|purple|orange|red|white|black|blue} and {green|yellow|purple|orange|red|white|black|blue} mood with {forest|jungle|city|village|ruins|dungeon|fortress|seaport|island|cave|desert|canyon|moutain|country side|swamp|valley|garden|funfair|park|volcano|tundra|beach|mangrove|lake|savannah|cascade|ice floe} next to {forest|jungle|city|village|ruins|dungeon|fortress|seaport|island|cave|desert|canyon|moutain|country side|swamp|valley|garden|funfair|park|volcano|tundra|beach|mangrove|lake|savannah|cascade|ice floe}, {noon|golden hour|blue hour|mist|rainy|storm|snowy|warm|cold|aurora borealis|windy}, epic, majestic, 360, 360 View
Here are some examples of prompts you will get :
– A concept art of a white and orange mood with ruins next to jungle , golden hour, epic, majestic, 360 View
– a digital painting of a red and purple mood with forest next to valley, rainy, epic, majestic, 360, 360 View
– a pixel art of a white and yellow mood with forest next to ruins, cold, epic, majestic, 360, 360 View
– a concept art of a blue and white mood with forest next to island, golden hour, epic, majestic, 360, 360 View
As you can see, it will choose first a style, then two main colors, two environments, and finally a weather condition, all randomly.
You can see some panoramas made with this prompt on: https://virtualworlds.fun/360/slideshow/v2/
I also made a 360 Panorama Preview with BabylonJS on: https://virtualworlds.fun/360/
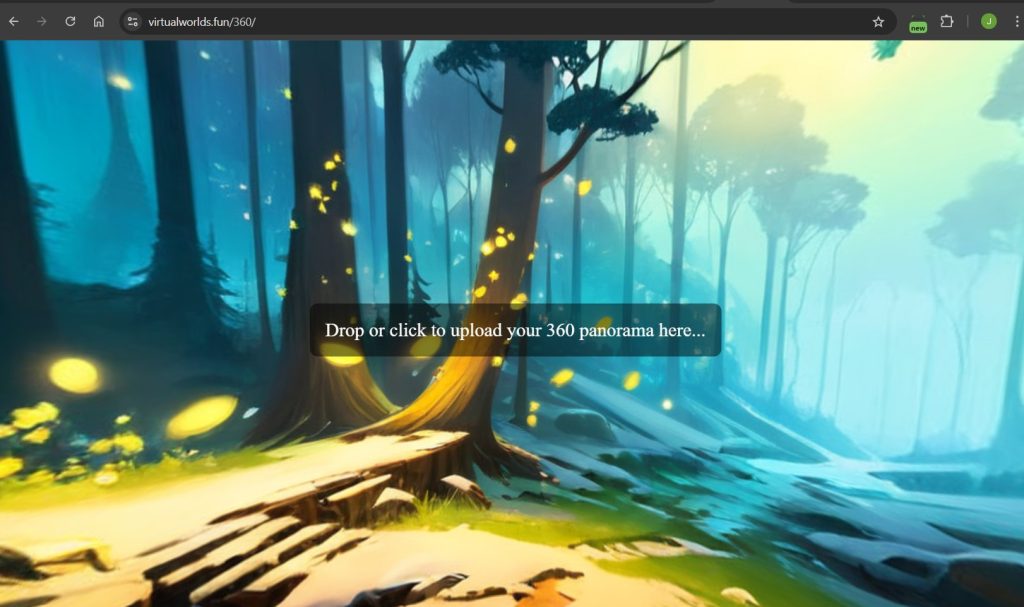
Use it as much as you want, it’s quick and simple. To use it you only need to drop the picture on the computer screen or click on the mobile button to upload. Press the left mouse button to look around and the mouse wheel to zoom.
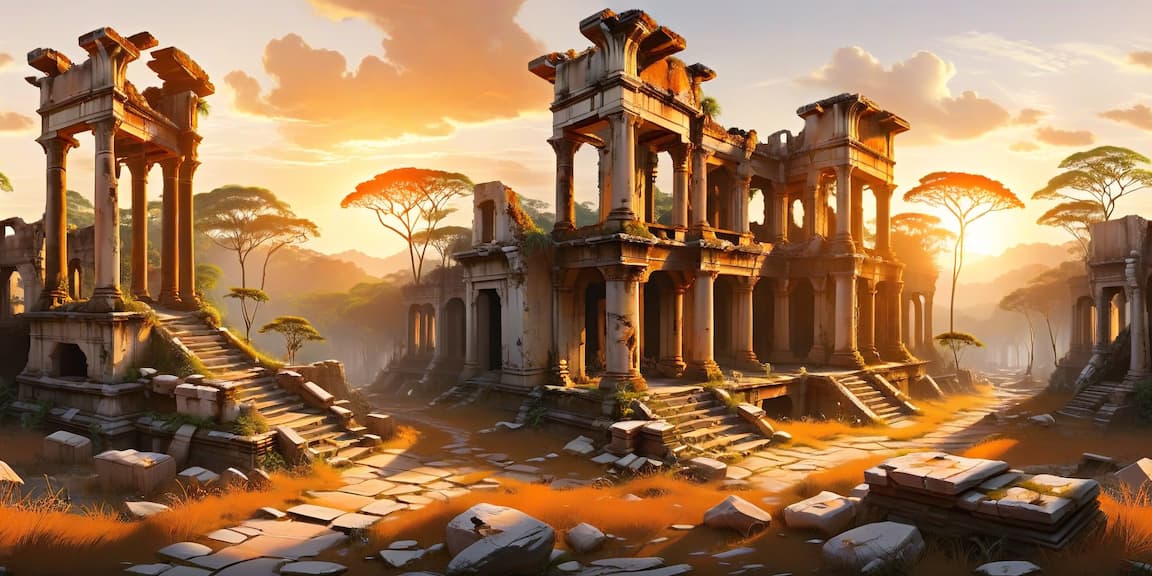
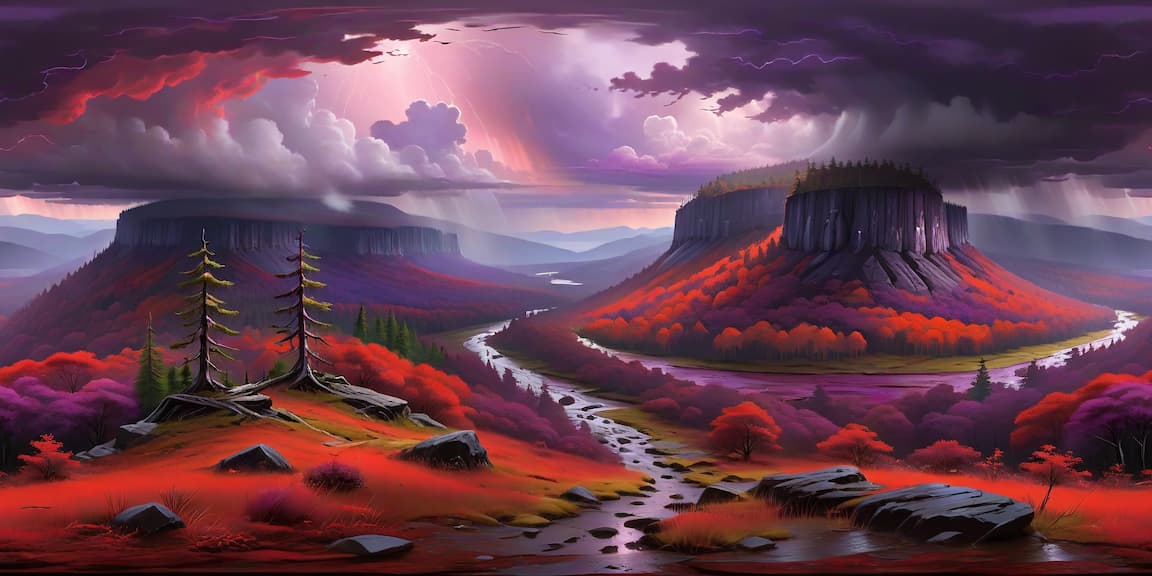
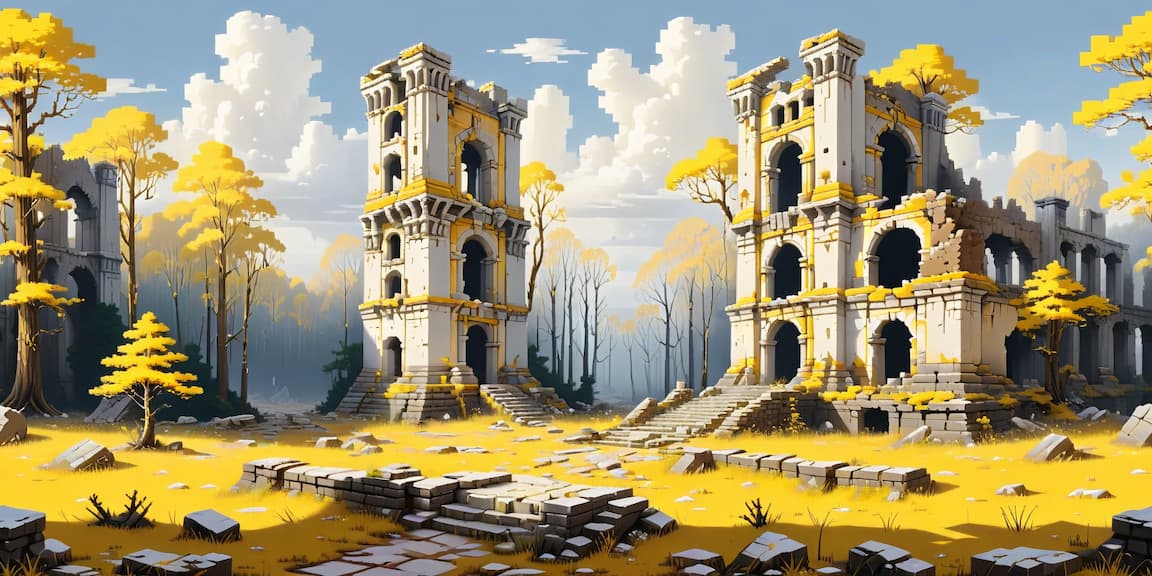
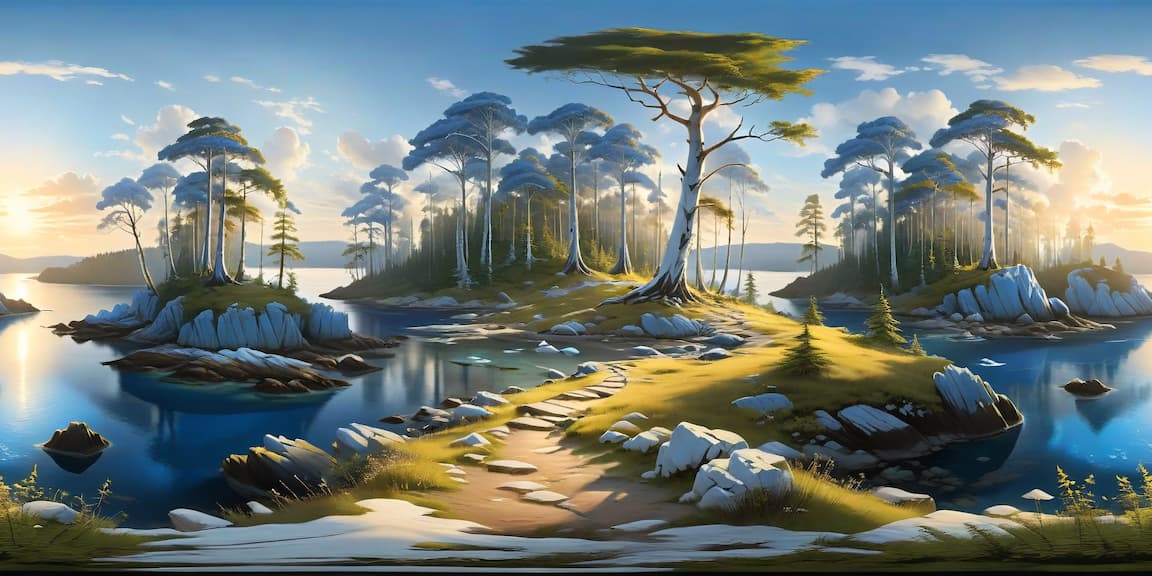
Gallery of various 360° Panoramas I made with Stable Diffusion 1.5 and SDXL. Click on pictures to preview on Panoraven.


Check my latest 360° panoramas on TikTok
Go further:
Stable diffusion art: One of the best places to learn Stable Diffusion with tons of tutorials.
Civitai.com: Community portal for stable diffusion models, loras, and ai generated pictures.
YouTube channel of Olivio Sakiras: news and tutorial about Stable Diffusion.
Generative AI Glossary: A glossary about all the technical words
Comfy.icu: to test workflow online
High resolution 360 VR with ComfyUI, upscaling, tiles, lora : Valdimir Chopine [GeekatPlay] made a detailed video showing the entire process of creating a 360° panorama using ComfyUI, Panoraven and Lora, unfortunately without mentioning this article.
How does one prevent the local upsampler from breaking the seamless tile?
Do you have any trouble when upsampler? I notice that if you excess your VRAM, ComfyUI tells that it will use tile mode and then a little border appears. Maybe you need to lower your resolution like 1536×768 if you have less than 4GB.
I’m using ComfyUI for the first time, and thanks to your help, I was able to create 360 panoramas without much difficulty. However, I have a problem. When I test the generated image using a 360 viewer, I notice distortions, especially at the top and bottom seams, where the image compresses. This is particularly noticeable when I try to create an interior photography studio. How can I fix this problem? I want it to be flawless, like the skyboxes created in Blockadelabs. I hope you can help me. Thank you very much for your efforts. Have a good day
Hello Fatih!
The quality keep increasing since Stable Diffusion 1.5, but it’s not perfect. Another way is to correct it with a graphical tool like Gimp or Photoshop. If you have a powerful card you could also give it a try Flux models. Anyway, If you already find a solution you can share it and I will be happy to update this tutorial.
Workflow seems to be missing as links only contain images
Hello Paul,
Once you launch your ComfyUI, just drag and drop the image on your comfyui web page, it will show the workflow included inside the image. It’s the way ComfyUI works. Do you think it will be clearer if I add the json workflow file?
Hey, I rarely comment, but your post was so helpful! Thank you very much, I also understood a lot more about how to use comfyUI. :—)
I’m so glad I made it! Thank you for sharing the production details in such depth. And as you mentioned, if the GPU memory isn’t sufficient, it’s necessary to lower the resolution.
Thank you ! Thank you !!
I’m a totally new user of ComfyUI and this is exactly what I was looking for !
Precise and perfect step by step visual explanations. I’m very grateful for the great work 🙂
Real cool, thanks !